TCP copy & RTA (Enterprise)
Creating a TCP Copy Job Enterprise
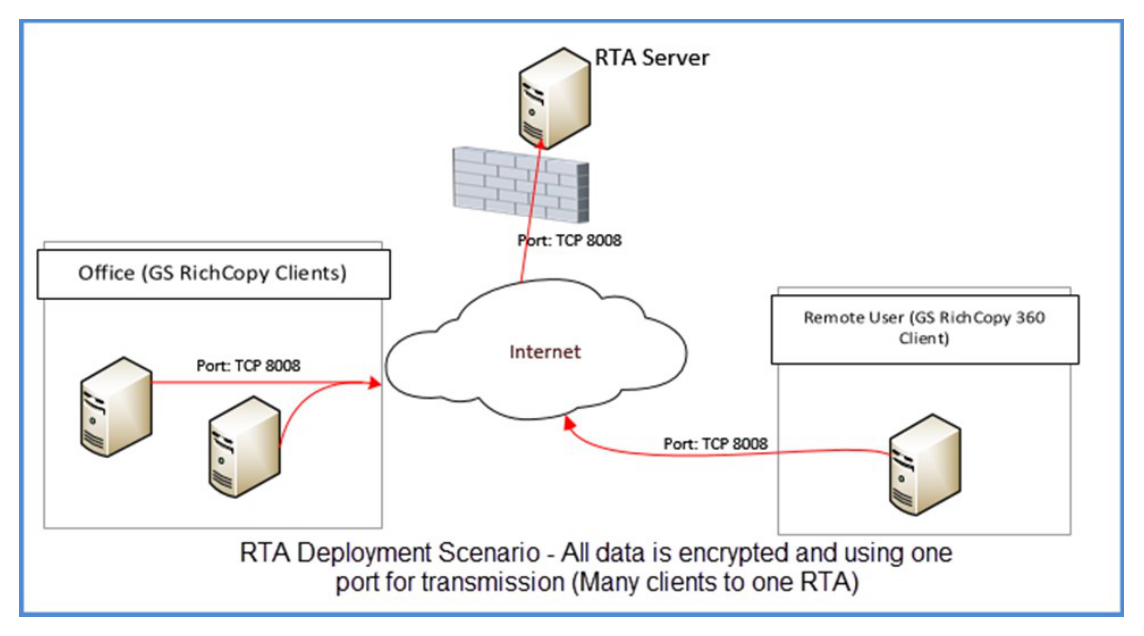
A TCP copy job offers many advantages. It requires only one single port between source and destination to transmit the data to be copied. It also provides additional features that are not available in the normal copy method such as encryption and file compression during data transfer.
Minimal configuration is required on the client side (source machine) and on the recipient machine (destination). The recipient machine must have the Remote Transfer Agent (RTA) installed to receive the data as it is transmitted.
To create a TCP Copy Job, follow these steps:
Client/Source Configuration
- In the GS RichCopy 360 window, select the Jobs selection, and select New Job.
![]()

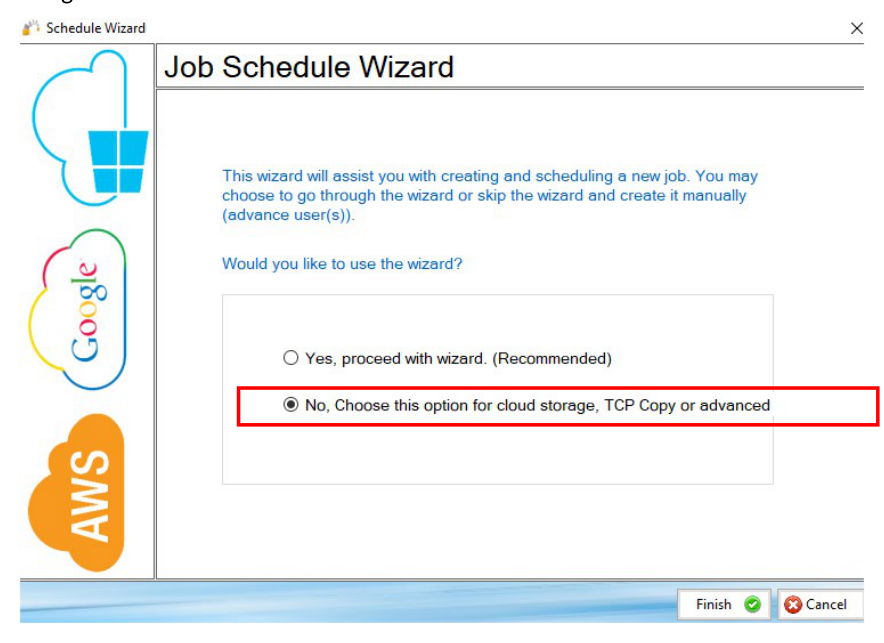
The Job Schedule Wizard will display.
- Select No, Choose this option for cloud storage, TCP Copy or advanced, and then select Finish.
This will bypass the wizard and open the Copy Job Configuration window where a TCP copy job can be configured.
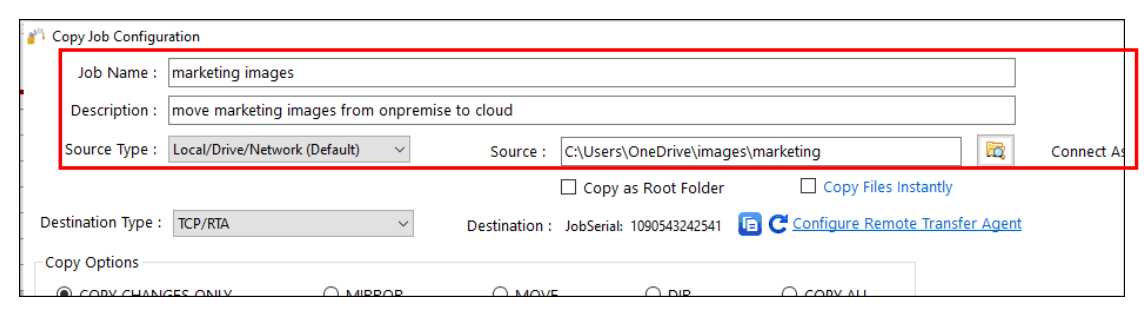
- Enter the details for Job Name, Description, Source, and the rest of the options as desired except for Destination.
- Select TCP /RTA for the Destination Type.
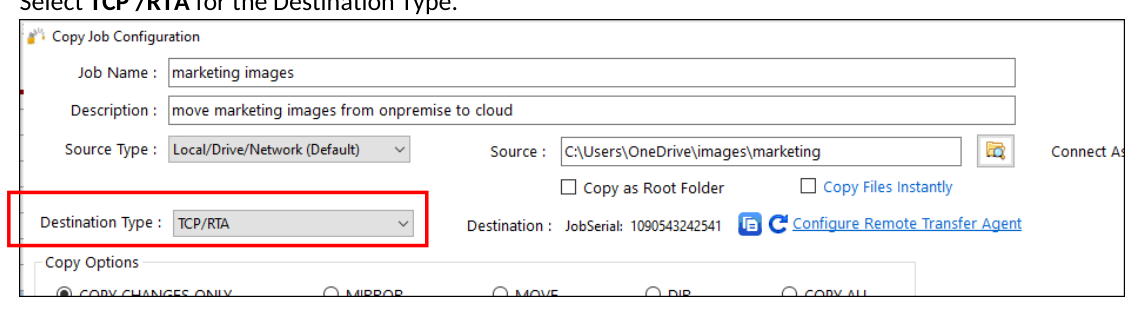
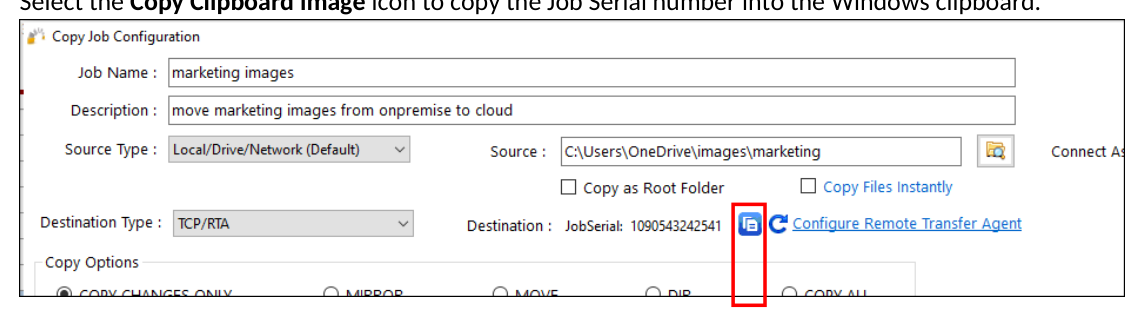 5. Select the Copy Clipboard image icon to copy the Job Serial number into the Windows clipboard.
- Select the Configure Remote Transfer Agent link to open and configure the Remote Transfer Agent Client Configuration window.
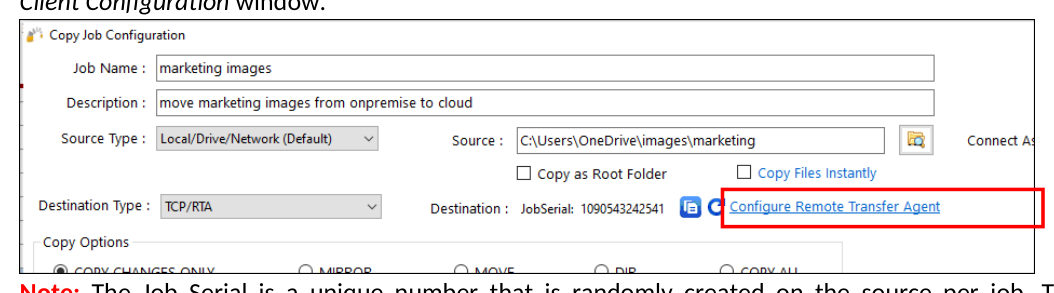
Note: The Job Serial is a unique number that is randomly created on the source per job. The administrator will provide the job serial number on the target machine (RTA) as the administrator creates the destination of the job.
Note: The Job Serial number can be set by an administrator if required. This can be done from the command line. All manually set Serial Jobs must be prefixed by 99999 and should be a total of 13 numbers. This can be useful in scenarios where an administrator wants to automate job creation on the client and the RTA server. For more information, refer to Example Section J – Command Line (CLI) Support.
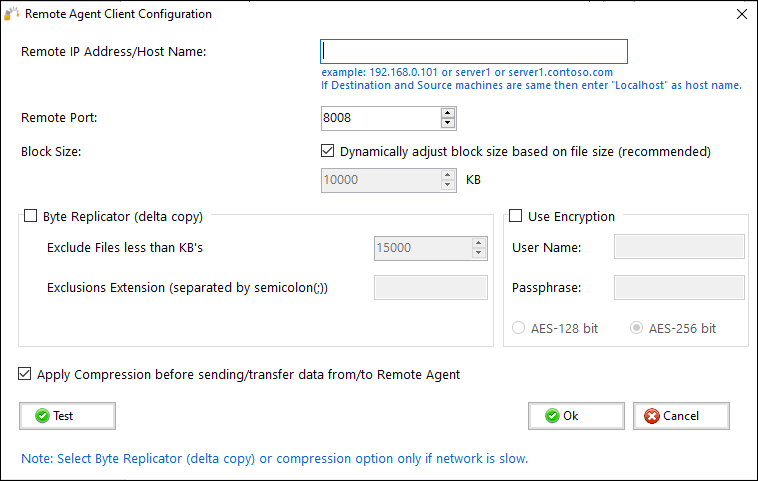
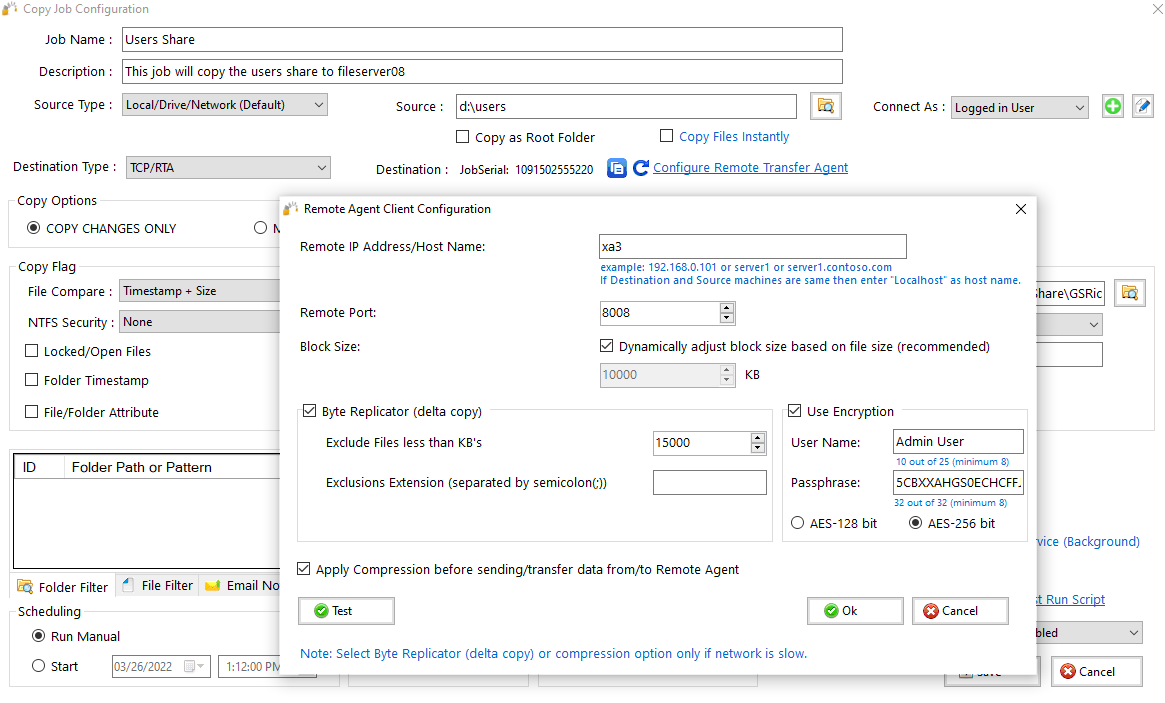
- Make your selections in the Remote Agent Client Configuration window. Note that a remote IP address or host name must be provided. For additional information see the section below.
Remote Agent Client Configuration Window
This section provides additional information about each field in the Remote Agent Client Configuration window.
Refer to these items for additional information about the specific fields:
(1) Remote IP Address/Host Name—refers to the recipient server (destination server) where data is sent when the RTA agent is installed. This could be the IP address of the destination server, short name (NetBIOS), or FQDN name for as long as the source machine is connected to the RTA machine.
(2) Remote Port—by default, GS RichCopy 360 uses TCP 8008 for its communication needs. This port is configurable. If changed, it is important to change it on the RTA agent as well. For information, refer to Destination Configuration.
(3) Block Size—GS RichCopy 360 transmits the files in chunks when using the TCP method. It is highly recommended to leave it set to the dynamic option (“Dynamically adjust block size…”) as this will determine the best chunk size. However, this option can be changed if needed. The default setting is 10MB and the accepted range is between 50KB and 25MB.
(4) Byte Replicator—Byte Level allows you to transfer just the changed data in a file when synchronizing, instead of the entire file. This is useful in saving bandwidth especially when dealing with large file sizes. If this option is selected, there are two additional parameters that can be configured:
-
Exclude Files Less than KB’s—files that are smaller than the specified size will not go through byte level comparisons. Instead, they will be copied fully in the event the source and target mismatch. This size should be greater than the Block Size value.
-
Exclusion Extension—administrators may decide not to have files of certain extensions going through a block level comparison for various reasons. If so, set those extensions and separate them with a semicolon if more than one extension is needed.
(5) Use Encryption—encryption in GS RichCopy 360 is very easy to use. A Username and a Passphrase are required. The combinations will need to be retyped in the RTA agent of the destination computer, at a later stage. GS RichCopy 360 supports AES 128 and AES 258. Encryption adds very little to the overhead when using modern CPUs that support the AES instruction set.
(6) Apply Compression before sending data to RTA agent—another advantage of using the TCP method is the option to compress data before transmission. GS RichCopy 360 uses high and robust levels of compression, which is one of the most trusted, reliable, and robust compression algorithms defined to date.
(7) Test—if the RTA is installed on the recipient (receiving) machine, the test button can confirm if it can establish a communication. If it reports that it is failing, it is likely to be a firewall port issue, or that the RTA agent service is not started on the recipient machine.
- Select OK to save your selections.
Once a TCP job is configured on the client side (source machine), similar configurations need to take place on the RTA (destination machine). The RTA agent must first be installed on the destination machine before it can be configured. If the RTA is not yet installed, refer to Installing RTA. If the RTA is already installed on the destination machine, follow the steps in the next section to complete the TCP job configuration.
Destination Configuration
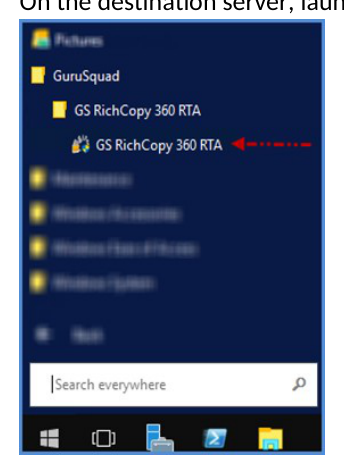
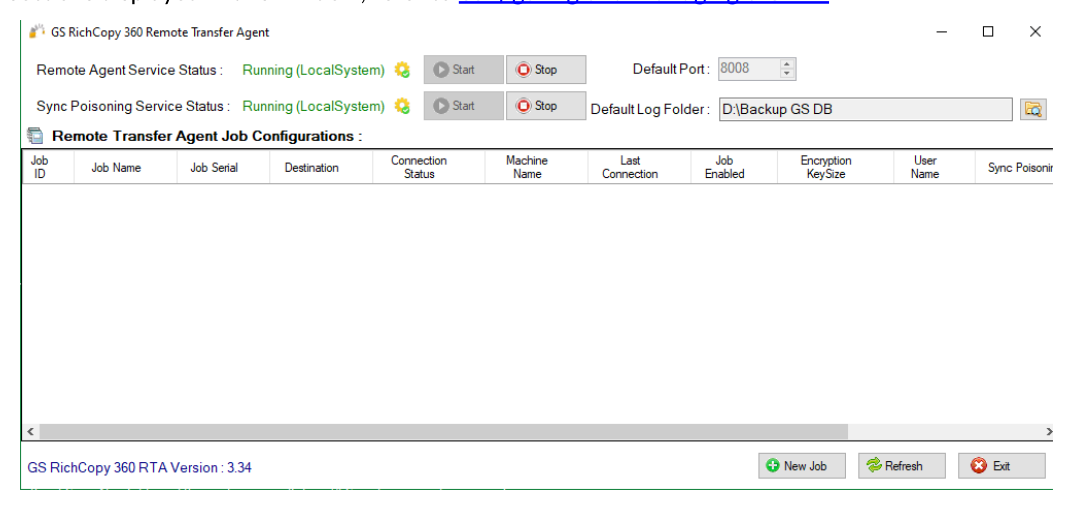
- On the destination server, launch the RTA management application.
The GS RichCopy 360 Remote Transfer Agent window will display. For more information on the sections displayed in this window, refer to Configuring and Managing the RTA
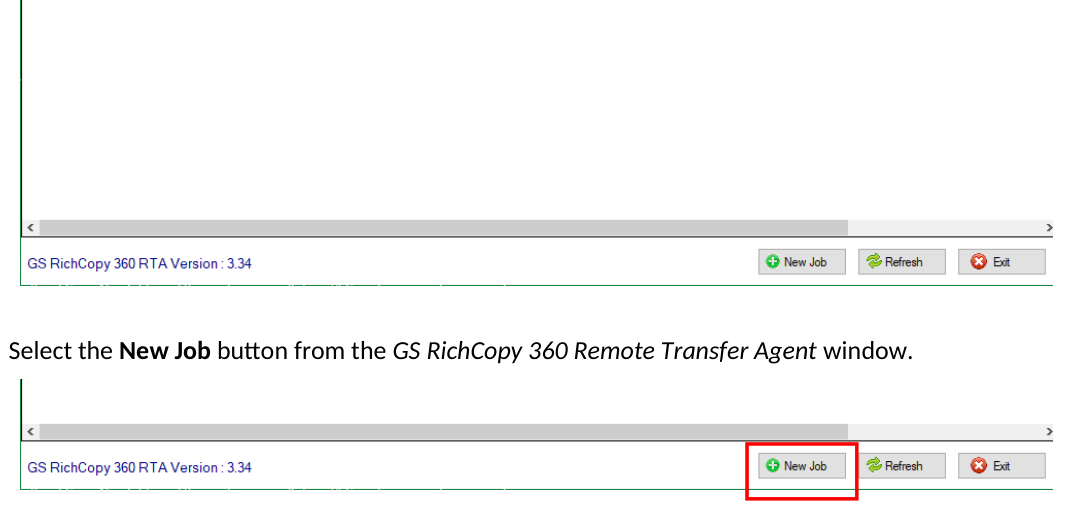
- Select the New Job button from the GS RichCopy 360 Remote Transfer Agent window.
The RTA Job Configuration window is displayed.
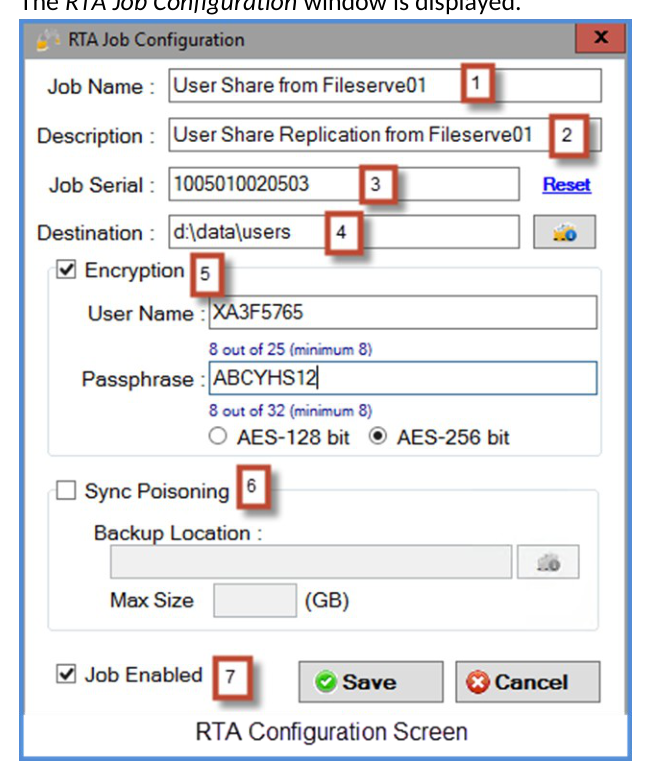
Enter the necessary information for the following items:
-
Job Name—the name of the job that is used to identify it. The name must be unique. It is highly recommended to use a descriptive name such as Accounting Data or Copy Email Archive so that other users and administrators can understand the purpose of the job.
-
Description—describes the job.
-
Job Serial—must match the Job Serial number presented on the client side (source machine).
-
Destination—the path (folder) where you want to copy to.
Note: This is relative to the destination machine and not the source machine. Also, the Path variable is supported in this field. For more information refer to Example Section K: Environment Variables.
-
Encryption—if encryption is set in the source job, the username and passphrase must be provided to match what is configured in the source job.
-
Sync Poisoning—provides a safety net where data on the RTA server is backed up in the event it is about to get overwritten or deleted by its source job. Sync Poisoning works in a very simple way. Should a file get deleted or overwritten by a newer file coming from the source job, this file is moved over to the specified backup folder.
-
Backup Location— is where files and folders in the destination location are moved should that version of the file get deleted or overwritten by a newer file coming from the source job. The same directory structure is mirrored in the backup location so that files can quickly be identified.
-
Max Size (GB)—files are purged from the “backup location” when this threshold is reached. The deletion process will use FIFO as its deletion criteria.
Note: The Path variable is supported in this field. For more information, refer to Example Section K: Environment Variables.
- Job Enabled—enables the RTA server to accept incoming connections for this specific job based on its serial number. If the job is not enabled, any connections associated with this job will be rejected
Select Save to save the configuration.
The job is now ready to execute from the client screen.
Note: The Destination column in the Jobs section will show a serial number of a TCP/RTA job once it has been configured.
Remote Transfer Agent (RTA) Enterprise
Installing RTA
The RTA comes with its own standalone installation package. There are installation packages for 32-bit and 64-bit machines, GS RichCopy 360 RTA x86.msi and GS RichCopy 360 RTA x64.msi as shown in the following image.

Note: Access Database Engine is a prerequisite for RTA to function properly. It will be installed silently if needed. It needs to be in the same folder as the RTA MSI installation package to get installed.
To install RTA, follow these steps:
- Double-click the MSI installation package for your OS platform (x86 for 32-bit or x64 for 64-bit). The Welcome window is displayed.
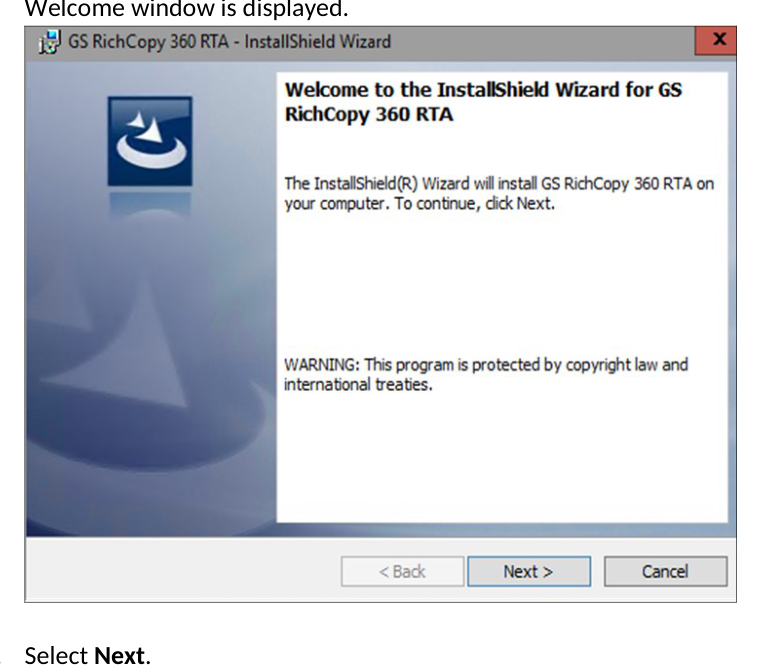
- Select Next.
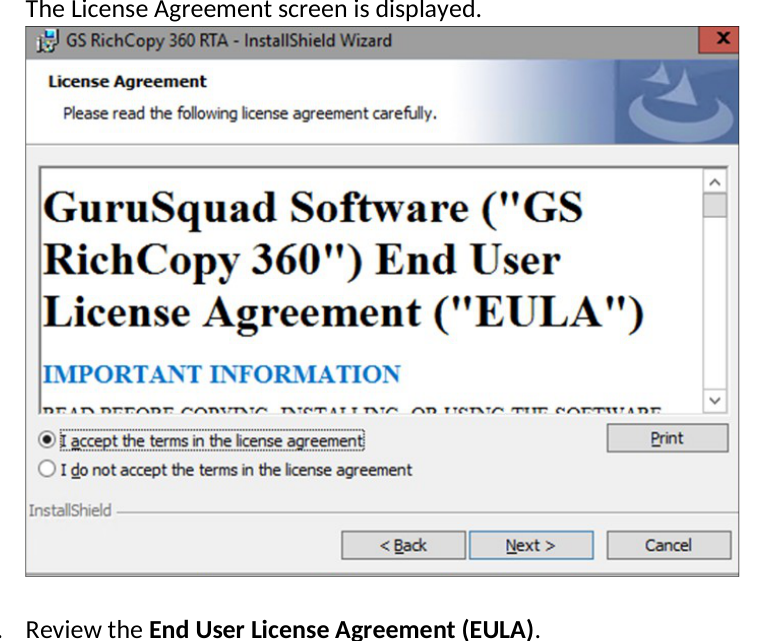
The License Agreement screen is displayed.
-
Review the End User License Agreement (EULA).
-
Select I accept the terms in the license agreement, and then select Next.
The Destination Folder screen is displayed.

- Change the path location if needed, and then select Next twice to start the installation.
When the installation has completed, the following screen will display.
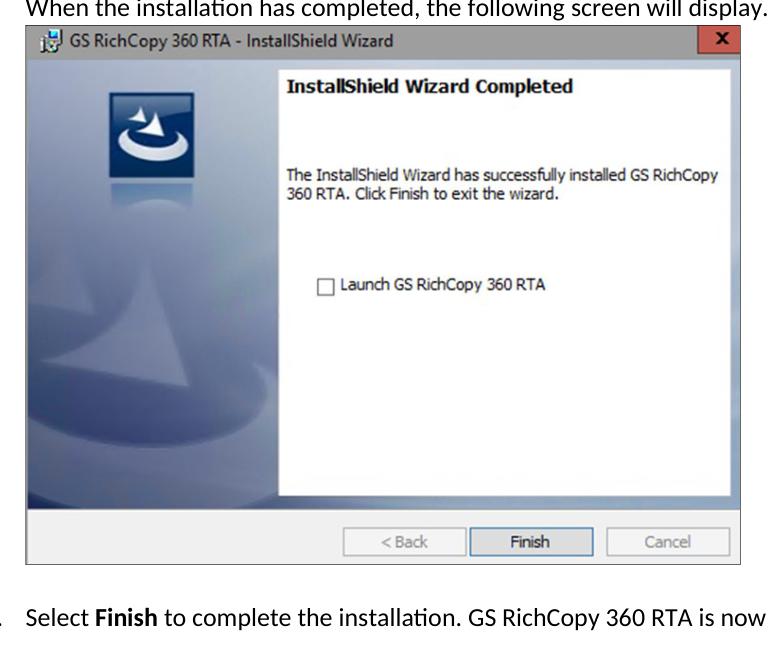
- Select Finish to complete the installation. GS RichCopy 360 RTA is now installed on your system.
Configuring and Managing the RTA
Once the RTA is installed on the target machine (destination machine), there are some minimal configurations that could be changed. However, upon a successful installation, it should work out-of-the box. This section provides information on the available options on the RTA screen.
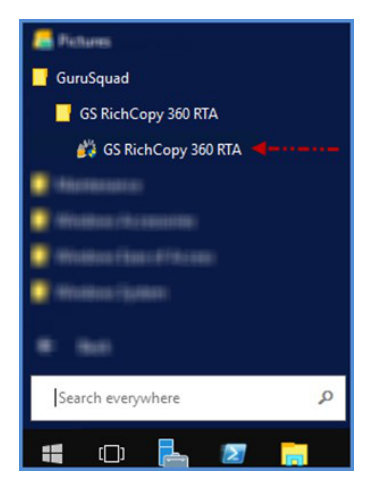
There is a single management interface for RTA, which can be launched from the Start menu.
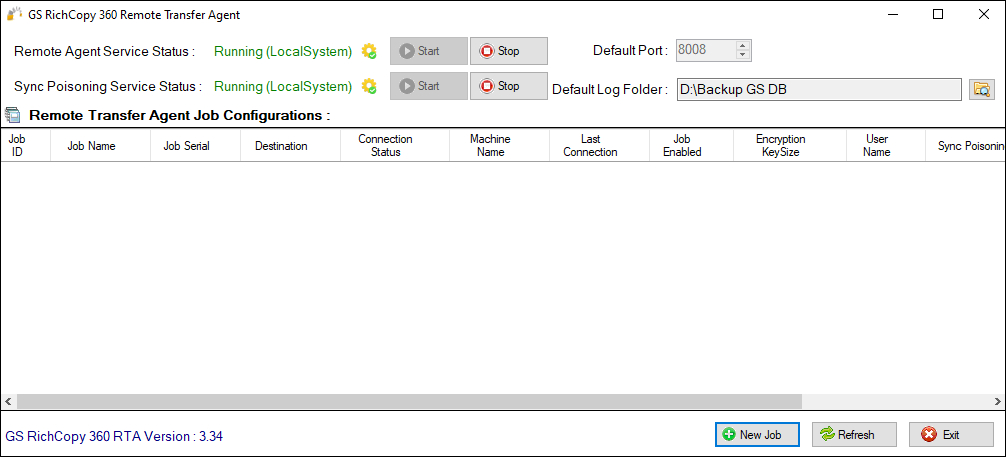
The RTA management screen provides a single viewer pane showing all current job activities in addition to overall configurations. The user should examine the different settings to get more familiar with it.
-
Remote Agent Service Status—RTA runs as a service. The service will either show as running or stopped and will also show the account it is running under. By default, it uses the local system account, which has full access rights to all local drives. The account can be changed through services.msc. The service is called GS RichCopy 360 Enterprise RTA Service. The Stop and Start buttons change the status of the service. Stopping the service terminates all current jobs and stops the server from accepting any new connections.
-
Sync Poisoning Service Status—the service oversees keeping defined Sync Poisoning locations in various jobs below their assigned threshold. Note that by default, it runs under the context of the local system. Should there be a need to use a different account, the account credentials need to be changed in services.msc for the service named GS RichCopy 360 Enterprise Sync Poisoning Service. Like the RTA service, the Start and Stop buttons change the status of the Sync Poisoning service.
-
Port—the RTA service uses port TCP 8008 by default. If there is a need to use a different port, this number can be changed and applied by clicking the Save link. Recycling of the RTA service is going to be required for the newly defined port to be used.
-
Default Log Folder —displays the current log folder and allows you to change its location.
-
New Job —TCP jobs require to be setup on the RTA server (receiving end). Clicking this button displays a new TCP job configuration screen.
-
Refresh—refreshes the current job activity screen. By default, the job activity screen refreshes every 15 seconds, but the administrator has the option to refresh as needed.
Byte Level Replication Enterprise
Byte level replication allows you to transfer just the changed data in a file when synchronizing, instead of the entire file. This is useful in saving bandwidth especially when dealing with large files. Byte level replication is available in both TCP copy and non-TCP copy. However, in TCP jobs, it must be enabled from the RTA configuration screen while in non-TCP jobs, it is configured from the main screen.
TCP job
Non-TCP job
 Note: Byte Level Replication requires the installation of RTA on the target (destination) machine even if the job is set as a non-TCP job. There are no configuration settings required on the RTA side once the RTA agent is installed. For more information, refer to Installing RTA.
One added feature when using Byte Level Replication is that the application of permissions, date, time stamp, and attributes is offloaded to the RTA agent on the target machine. This could cut down the time taken to apply them by as much as 90%. There are no additional requirements needed to turn this feature on as it automatically works as soon as Byte Level Replication is enabled and configured.
In TCP jobs, the RTA configuration on the client side inherits the settings of the TCP job when it comes to hostname, port, block size, and compression. In non-TCP jobs, however, Byte Level Replication requires that the settings are set. For more information on these settings, refer to Client/Source Configuration.
Note: Encryption is not available in non-TCP jobs, which is why the encryption option is grayed-out in the Byte Replicator Configuration window. Encryption with Byte Level Replication, however, is available when using TCP jobs.
Sync Poisoning Protection Enterprise
Replication is a powerful tool, and it is also non-discriminatory. If a series of files becomes corrupt or a user incorrectly alters a file on the source drive, those unwanted changes will be replicated to the copy location as well, unless the replication is handled by GS RichCopy 360 Enterprise. Whenever a file is modified at the source, GS RichCopy 360 Enterprise offers the Sync Poisoning feature to back up the copied original at the destination target drive location to another location before replicating the newly altered file. This ensures that you always have a prior version of every adulterated file and can go back to the unchanged file when using this functionality. GS RichCopy 360 Enterprise ensures that the availability and integrity of your files is always preserved.
Note that Sync Poisoning is defined and configured on a job-by-job basis. Each job has a configurable threshold where a quota can be set and is monitored real-time, so the backup disk never runs out of space.
Sync Poisoning is available only in TCP Jobs and is configured from the RTA server. For more information, refer to Destination Configuration.