Advanced features
Throttling Cloud Network Bandwidth
Copying data across to different cloud providers can be very taxing on network bandwidth. Fortunately, GS RichCopy 360 made it possible to throttle network bandwidth used for all jobs copying to the cloud.
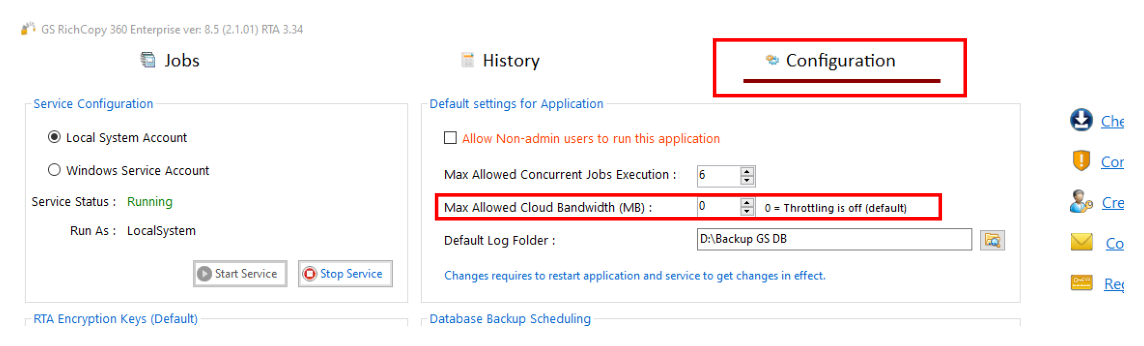
To throttle bandwidth, Select the Configuration section and set the maximum limit that can be used. Note that cloud jobs running as a service would not adhere to that limit until the GS RichCopy 360 service is restarted. Logged in user jobs take effect immediately. Value of 0 means throttling is disabled.
It is important to point out the following best practices when throttling cloud jobs:
-
Throttling cloud jobs applies to all cloud jobs. You cannot throttle one job and un-throttle another.
-
Cloud jobs running as a service and jobs that are running under logged in user are calculated separately. This means that if you set the throttle to 20MBps, then cloud jobs running as a service can only use a 20MBps pool and cloud jobs running as logged in user also have a separate 20MBps pool.
-
Normal and TCP copy jobs are not affected by bandwidth throttling.
-
GS RichCopy 360 sends data in 5MB chunks. When setting a limit of bandwidth, you should consider how many threads are used in all the cloud jobs that are running in parallel and account for 5MB for each thread. For instance, if you have a total of 2 cloud jobs and each job is running 3 threads, then you would calculate it as such:
2 (jobs) × 3 (threads) × 5MB (chunk) = 30MBPS
Note this is MBPS (Mega Bytes per second). To convert it to mbps (mega bit per second), you need to multiply it by 8. So 30MBps = 240mbps.
This is only a recommendation to keep jobs running smoothly. If the recommended network speed is higher than the available bandwidth to be allotted, you can lower the limit and jobs will still run. GS RichCopy 360 will manage the threads; however, it is not recommended to use the entire bandwidth. It is also crucial to consider throttling cloud jobs if the network link is shared with other users or services that rely on that link.
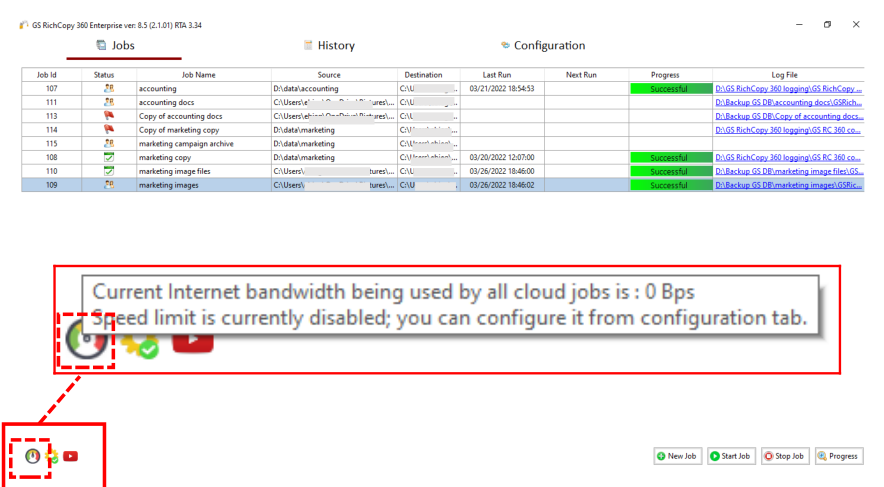
You can monitor bandwidth usage in two different places:
1) The speed gauge in the bottom of the jobs screen. Just hover your mouse on top of it and it will display how much cloud jobs are consuming.

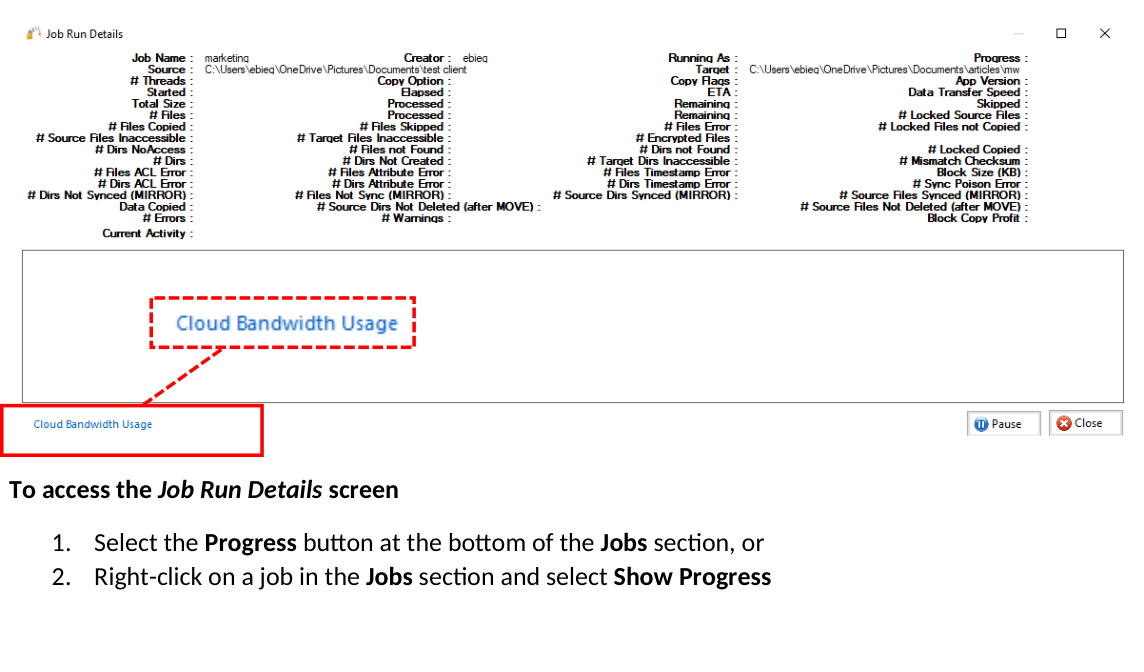 2) The other way to monitor cloud job bandwidth is to select the cloud bandwidth usage link found at the bottom of the Job Run Details screen.
To access the Job Run Details screen
-
Select the Progress button at the bottom of the Jobs section, or
-
Right-click on a job in the Jobs section and select Show Progress
Exporting and Importing batch jobs from CSV Enterprise
Using GS RichCopy 360 Enterprise, system administrators can import thousands of jobs with just a few clicks. To import jobs, follow these steps:
-
On the main Jobs section, create a dummy job that would act as a template for the jobs you want to import. The idea is to make all the necessary selections such as type of job (copy changes, mirror, directory structure), inclusion/exclusion filters, whether to run once, run at a specific time, repeat intervals and so forth.
-
Save the job.
-
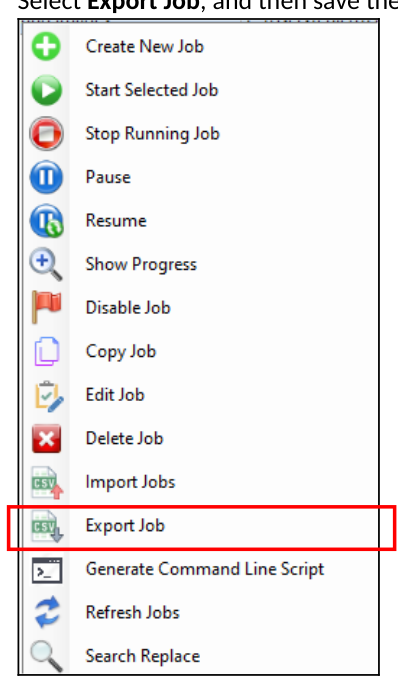
Right-click the dummy job in the Jobs screen to invoke the right-click menu.
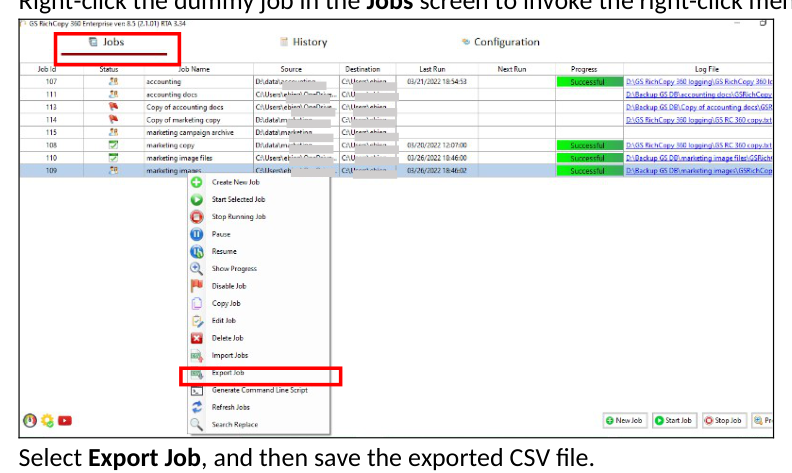
- Select Export Job, and then save the exported CSV file.
 5. Open the CSV file in a spreadsheet program such as MS Excel.
-
Copy and duplicate the dummy job. Each row will be imported as a job. Each job must contain a different job name. Ensure the source and destination are as needed and save the file (as a CSV file).
-
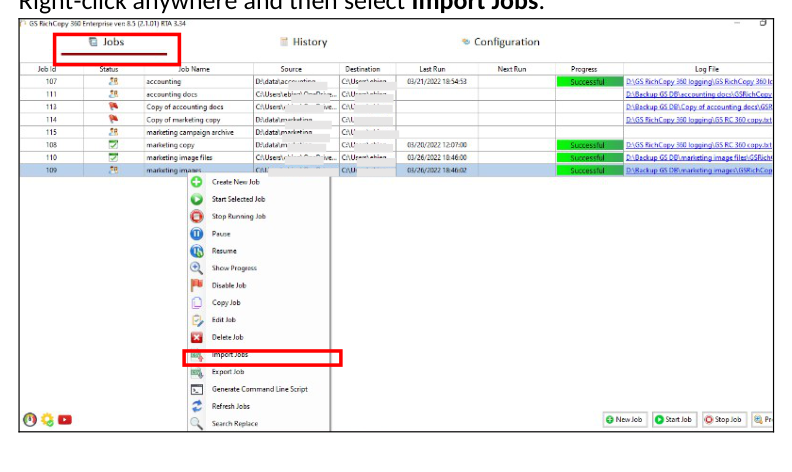
Go back to the Jobs screen of the GS RichCopy 360 Enterprise.
-
Right-click anywhere and then select Import Jobs.
-
From the Import screen, do the following:
-
Select Browse to go to the file.
-
Select Validate to validate that the jobs are not duplicated, and all the set values in the CSV are as expected. Once the validation runs through, any green rows are valid jobs; any red rows are rows with errors. If there are any errors, the errors can be seen scrolling to the right under the error column.
-
Select Import to start importing the jobs. Note that Jobs with errors will be skipped.
When the import is completed, a confirmation screen will be displayed. Go to the Jobs screen to view all the imported jobs.
Working with WebDAV Enterprise
Many cloud businesses and organizations use WebDAV to access remote storage due to the higher security level and ease of accessing data. GS RichCopy 360 Enterprise offers the ability to copy data ‘from’ and ‘to’ using WebDAV.
Use the Connect As feature in the Job Configuration window to specify your WebDAV credentials and to select them. Specify the WebDAV URL in the Destination field, as shown in the following image.
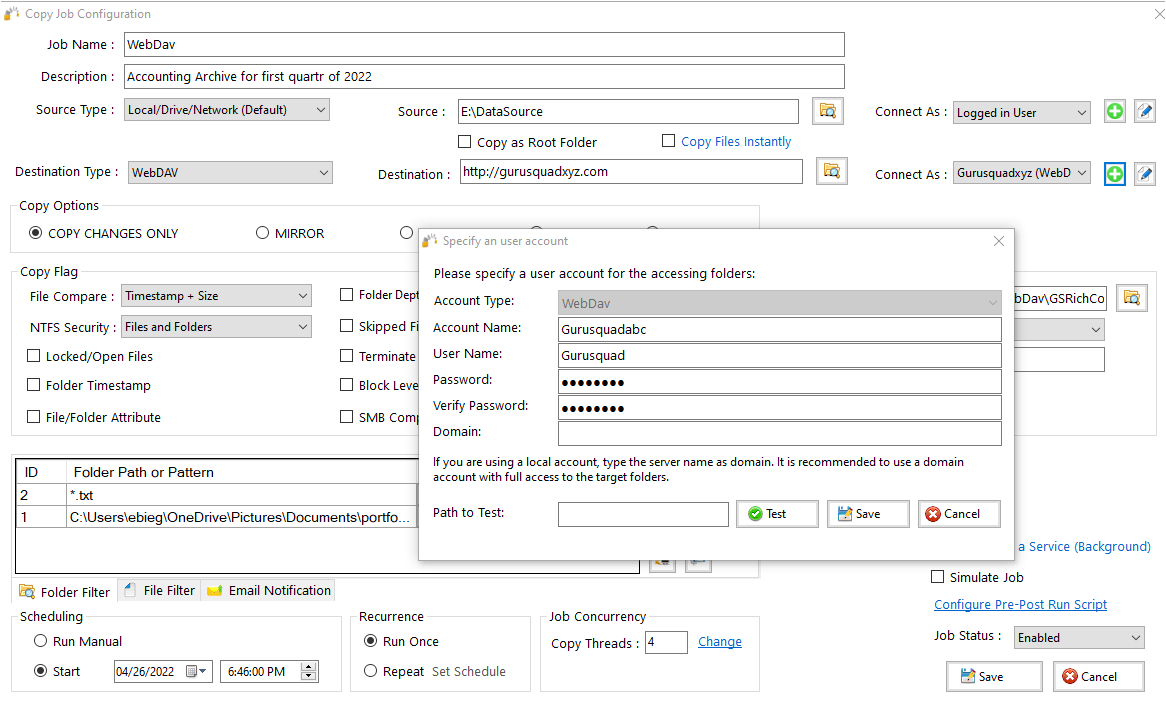
Some WebDAV providers may require you to leave the Domain blank, while others may require a domain entry.
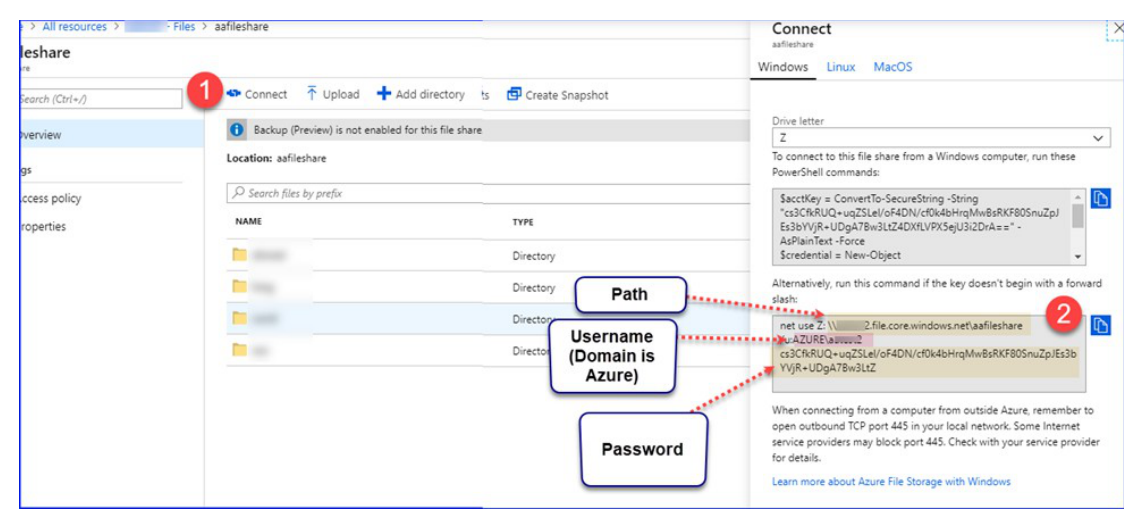
Accessing Azure Files
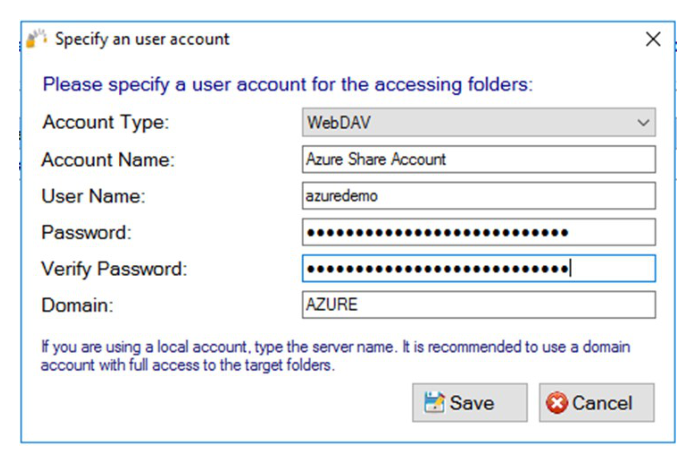
If you are using Azure Files, check the following settings as an example to access Azure Files using WebDAV.
Configure the following settings in the GS RichCopy 360 Client.
Configure the destination or source in the Job Configuration.
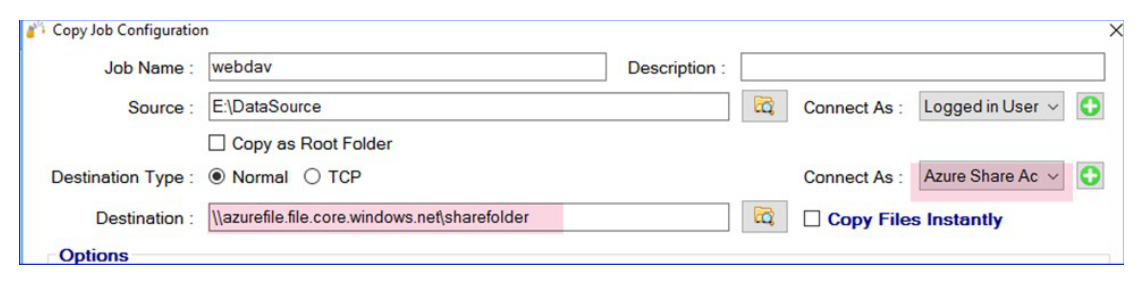
Note: WebDAV for Azure uses a UNC path instead of https as Azure supports SMBv3, where a UNC path can and should be used.
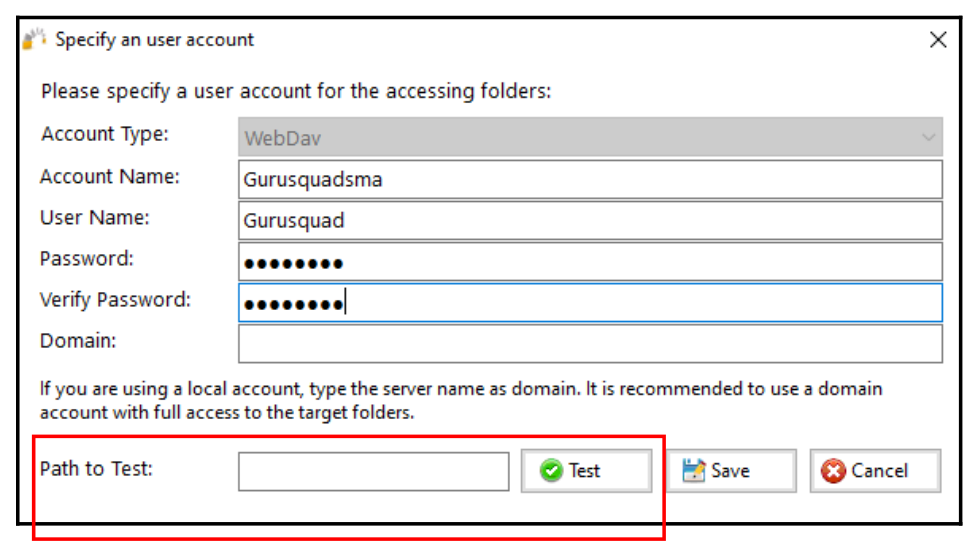
“Path to Test” Functionality
Utilize the Path to Test functionality to pre-test the validity of your WebDav credentials and avoid unnecessary errors and delays in completing your copy job. To utilize this feature, enter the path in the provided field and then select the Test button.