Frequently asked questions (FAQs)
Frequently Asked Questions (FAQs)
This section discusses the frequently asked questions typically received by our support and sales staff. We have compiled this list and are continually updating it to provide you with the best support information available.
If you do not find your question or need assistance, feel free to contact us by email or by phone and we will gladly work with you:
-
Email: [email protected]
-
Phone: +1 703 868-9252
Assigning Log On as a Service
Question: When we specify a username and password to use for our GS RichCopy 360 server, the service fails to start. This account is already an administrator. How can we start the service?
Answer: In Windows 2008 R2 and later, when specifying a username and password for GS RichCopy Service to use (main Configuration section) if the service fails and cannot start, the user should set Log on as a service privilege. This can be accomplished in two different methods.
Method 1
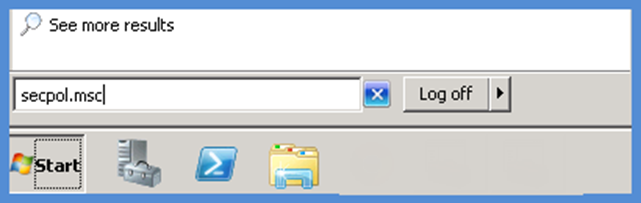
- Go to the Start menu and then type services.msc as shown in the following image.
- Locate the GS RichCopy 360 Service and then double-click it.
-
Select the Log On tab, and then select This account.
-
Enter the username and password for the user you want GS RichCopy 360 Service to use.
-
Select Ok
These steps automatically grant the username you specified with Log on as a service rights. You should receive a notification that the right to log on as a service has been granted. Make sure to stop and then start the service for the change to take effect.
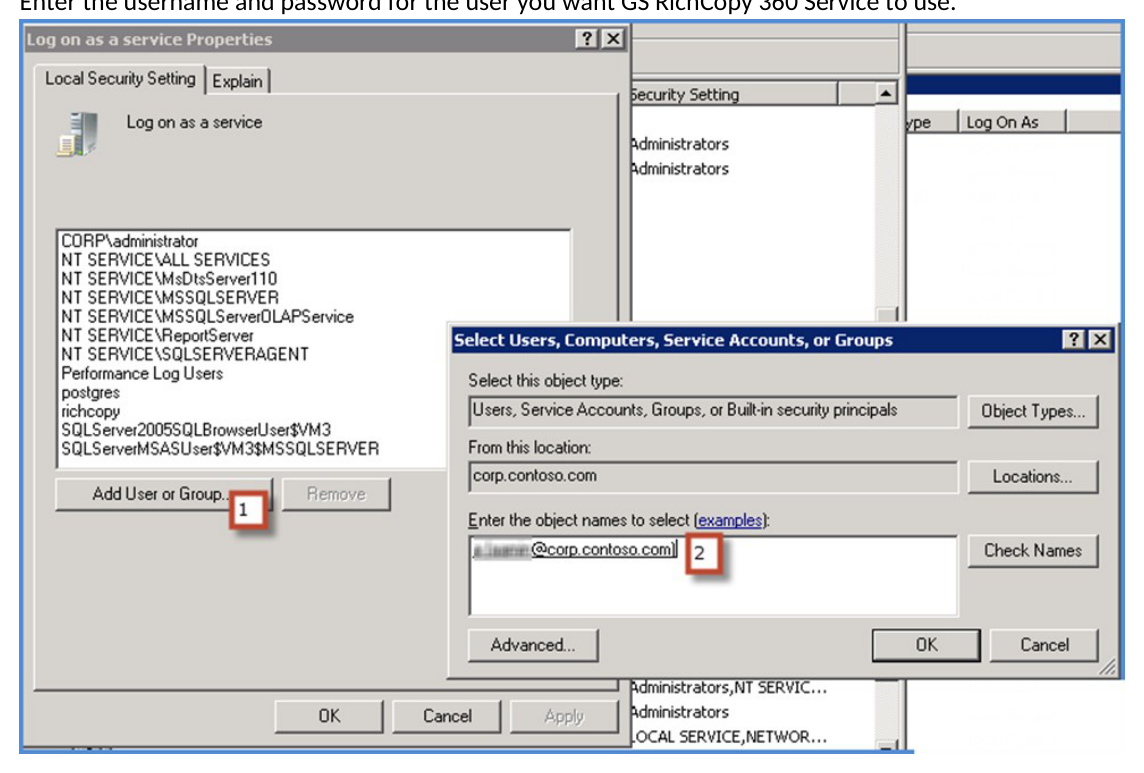
Method 2
- Go to the Start menu and then type secpol.msc as shown in the following image.
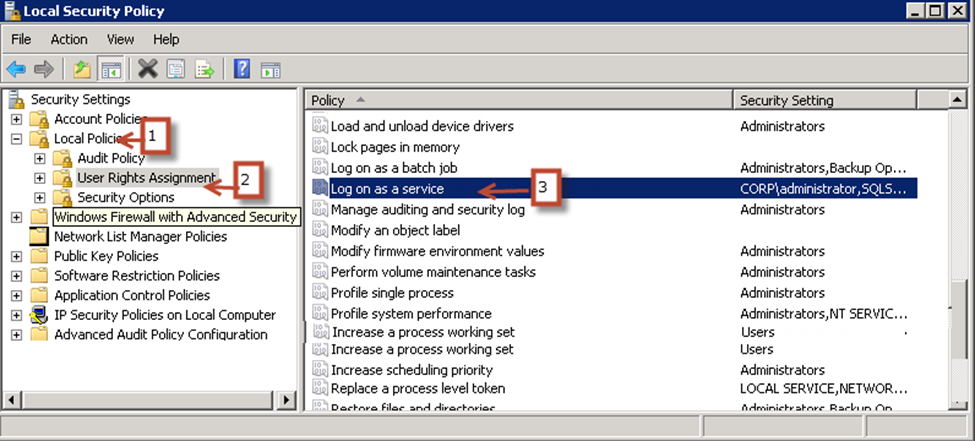 2. Select Local Policies → User Rights Assignment.
-
Double-click Log on as a service.
-
Select Add User or Group.
-
Enter the username and password for the user you want GS RichCopy 360 Service to use.
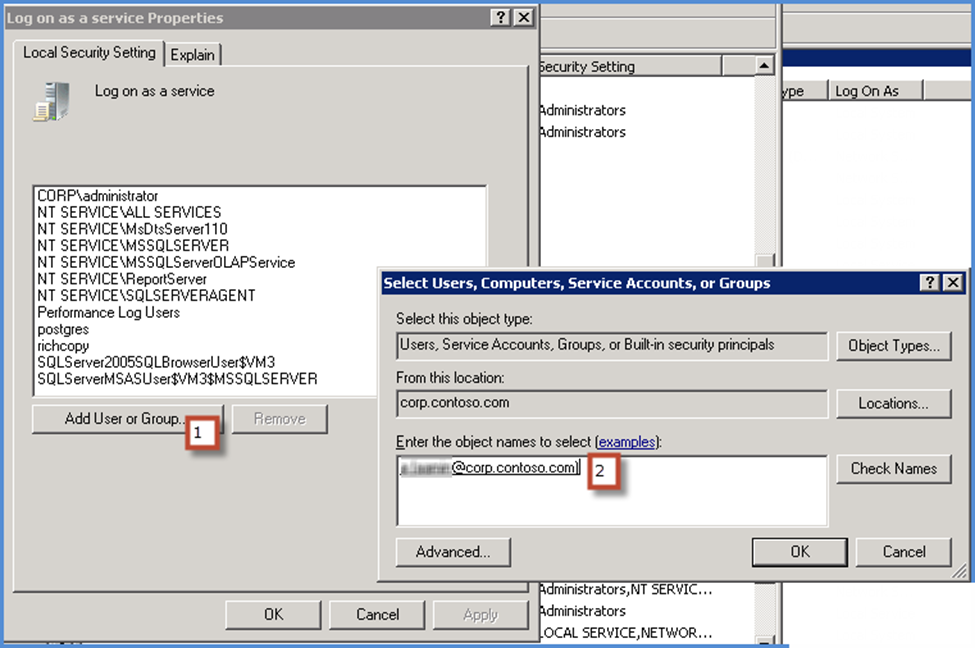
- Select OK on all windows.
These steps grant the username you specified with Log on as service rights. Make sure to stop and then start the GS RichCopy 360 service for the change to take effect.
Cannot See Mapped Drives
Issue: It says you need to restart after applying the registry key, but from our testing, a restart was not needed.
Answer: Check out the following two options that you can follow to see the mapped drives.
Option A
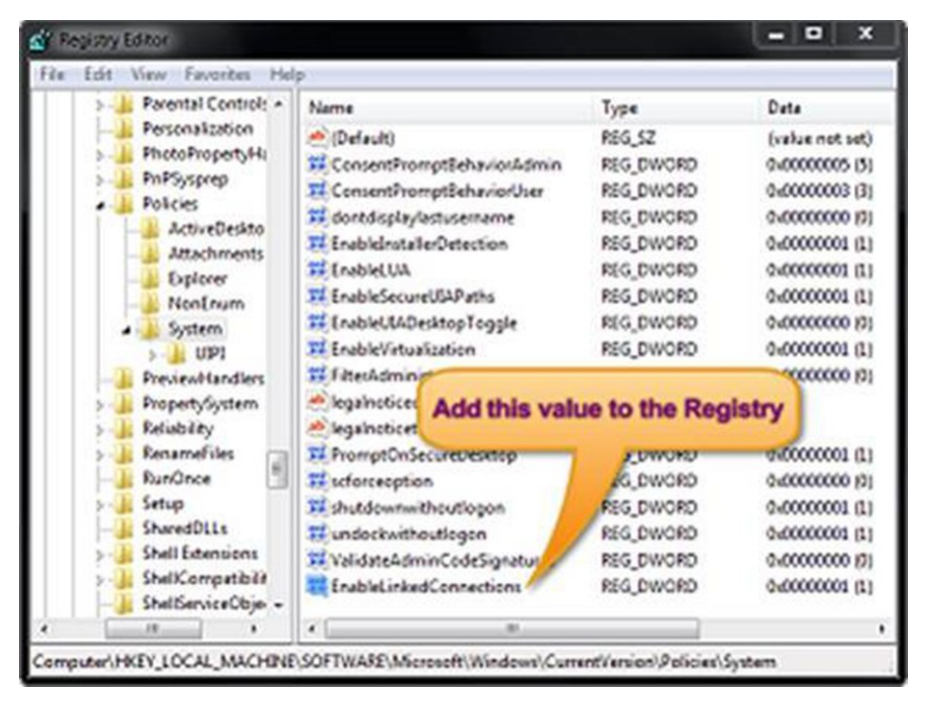
There is a way to force Windows to automatically make the network drives available to both the standard and administrator accounts. To do this, follow these steps:
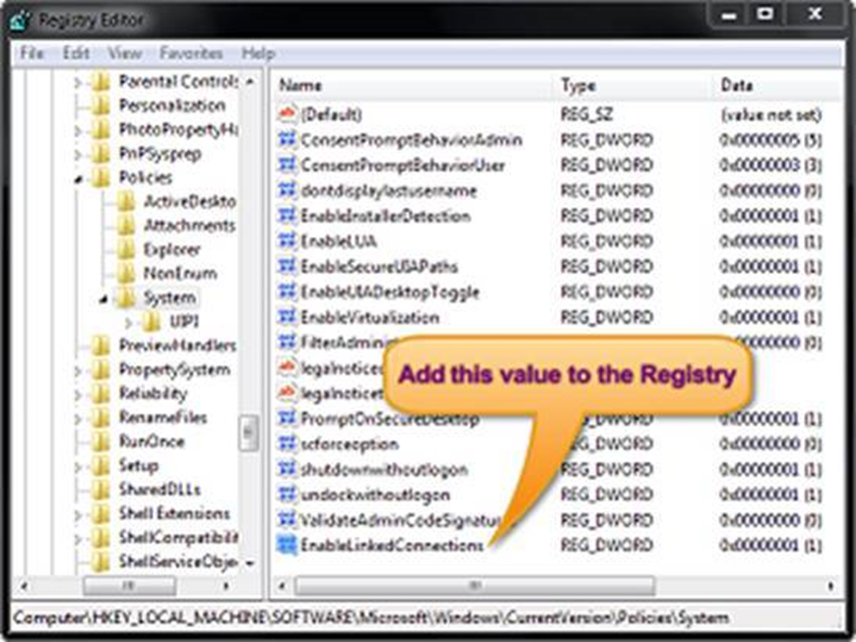
- Run the Registry Editor (regedit.exe) and then locate the following key:
HKEY_LOCAL_MACHINE/SOFTWARE/Microsoft/Windows/CurrentVersion/Policies/System
- Create a new DWORD entry with the following details:
-
Name: EnableLinkedConnections
-
Value: 1
CAUTION: If you are not very experienced with Registry Editor, please be extra careful. It is a powerful tool that can do a lot of damage to your system if used carelessly.
- After you’ve added the EnableLinkedConnections value to the registry, restart the computer. The network drives you create should become available to the elevated applications, as well.
Note that this is a limitation in Windows. The following is an article from the Microsoft website that discusses it in more detail: https://support.microsoft.com/en-us/help/3035277/mapped-drives-are-not-available-from-an-elevated-prompt-when-uac-is-co.
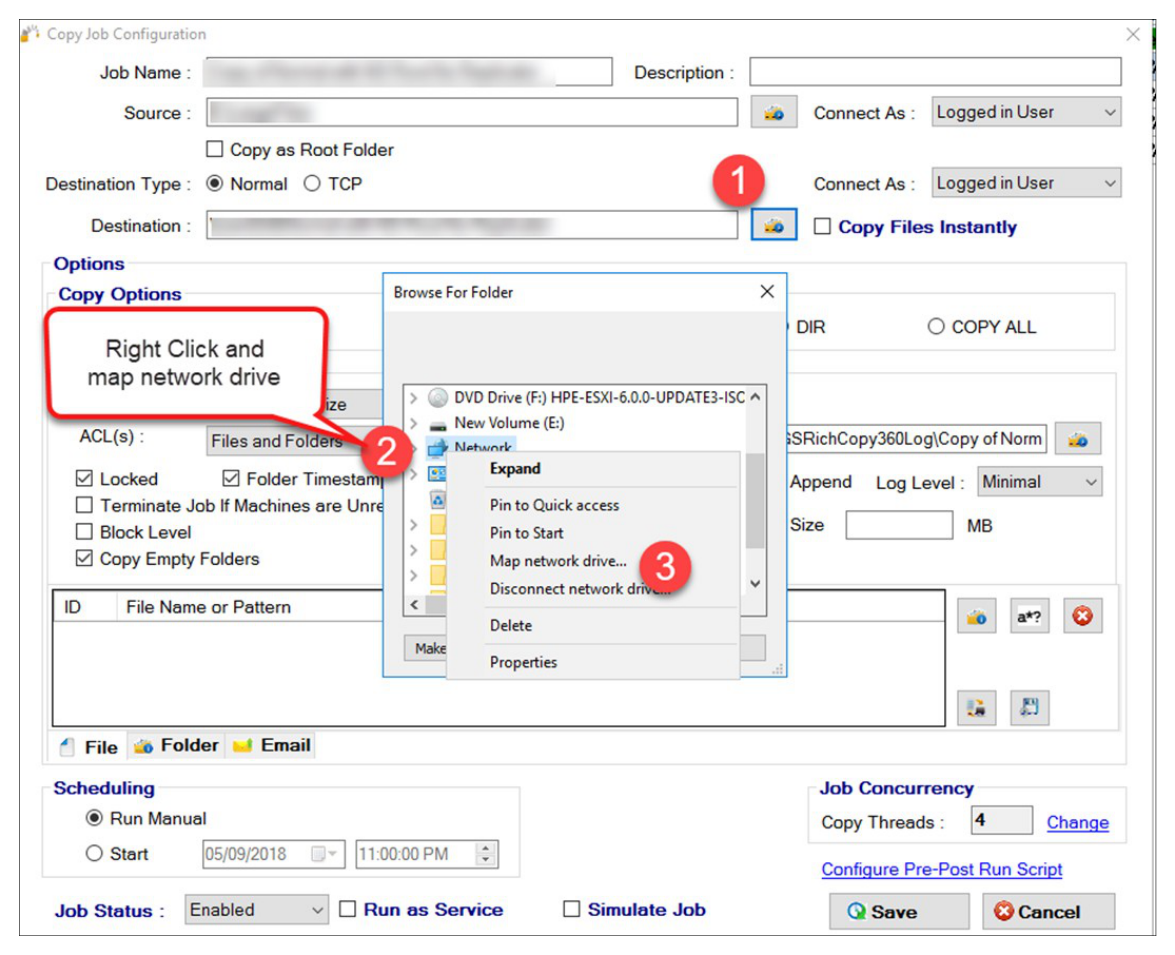
Option B
Follow the instructions below to map a network drive.
5