Configuration
Configuration
GS RichCopy 360 requires minimal configuration and is ready to work straight out-of-the-box. IT administrators also have the option to configure various components such as the following:
-
Running GS RichCopy 360 as a Windows Service* *
-
Creating Connect As Accounts
-
Setting Email Account Configuration
-
Setting the Maximum Allowed Concurrent Jobs Execution
-
Backing up and Restoring the GS RichCopy 360 Database
-
Allowing non-admin users to use GS RichCopy 360
All these settings are configurable in the Configuration section.
Running GS RichCopy 360 as a Windows Service
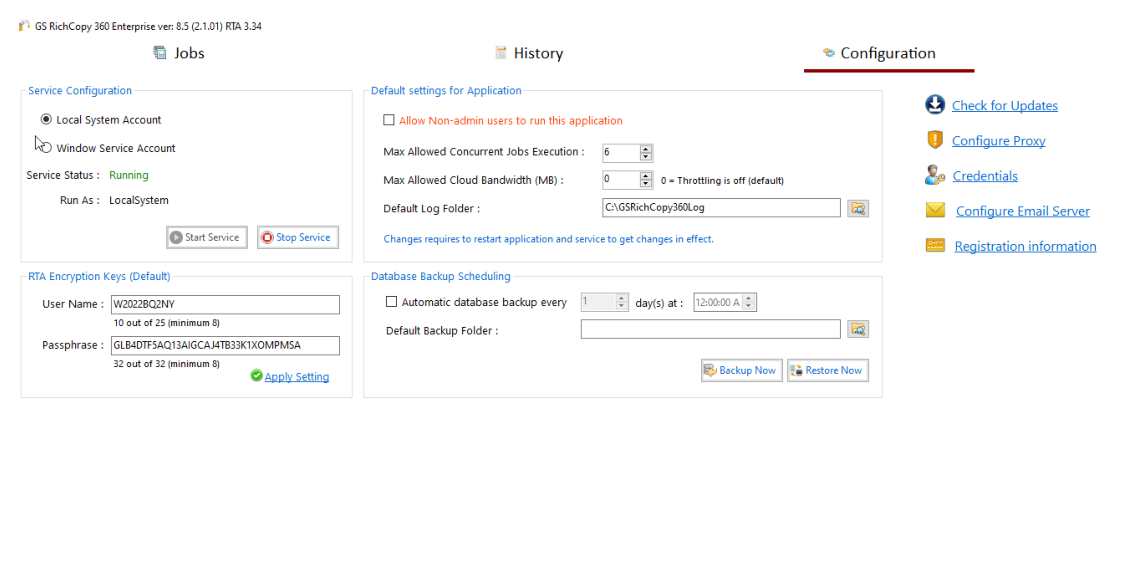
 By default, GS RichCopy 360 will install a service called GS RichCopy 360 Service. The service will be in an executable state running under the Local System Account. In the Service Configuration section, you can change it to run under a different user account. This user account can be a local user or a domain user. Preferably, the service account is a domain account that has access to both source and target locations. The account must have admin privileges to be able to copy, open, and lock files. It also must have Log on as a service permission if you are running on a Windows 2008 R2 or a later operating system. For more information, refer to Assigning Log On as a Service.
To run GS RichCopy 360 as a Windows service, follow these steps:
-
In the GS RichCopy 360 window, select the Configuration section.
-
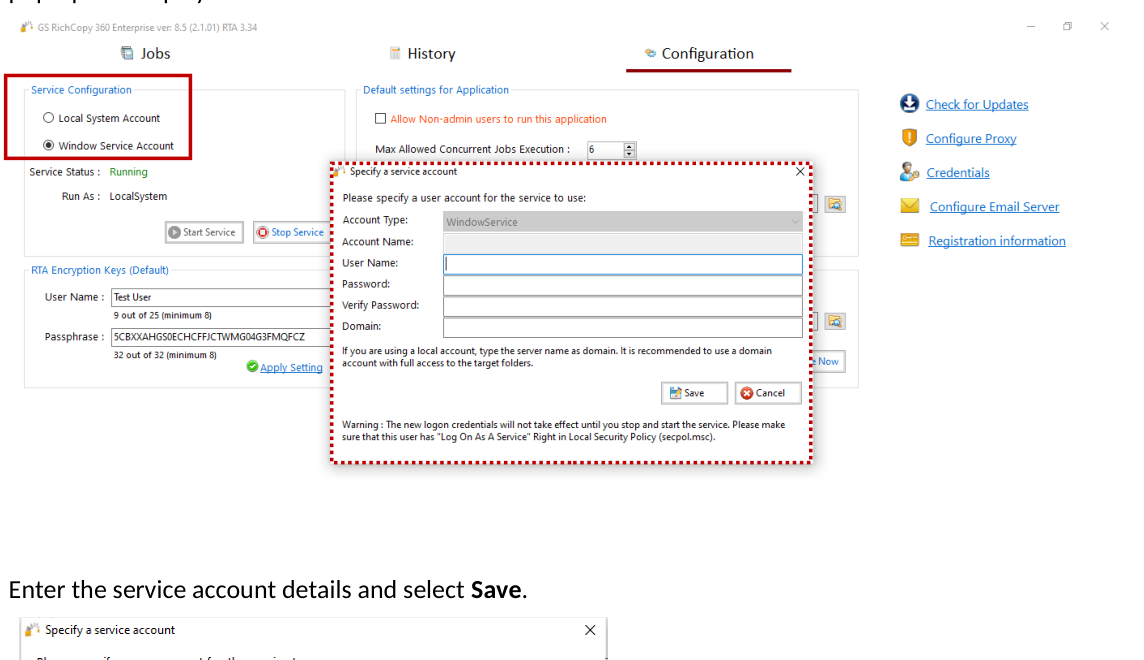
In the Service Configuration area, select the Windows Service Account. The Specify a service account pop-up will display.
-
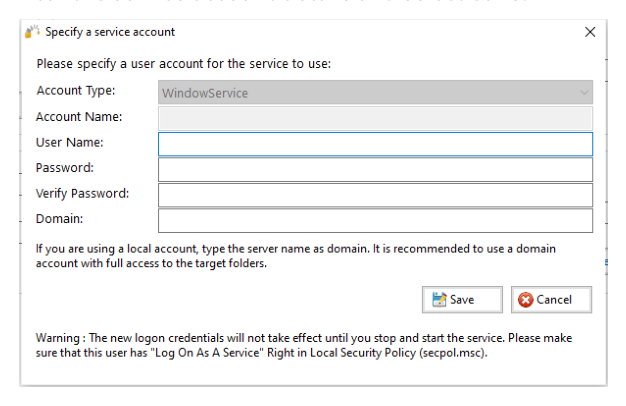
Enter the service account details and select Save.
Note: If you set different credentials or switch back to running under the Local System Account, it is necessary to stop and start the service for the changes to take effect. Use the Stop Service and Start Service buttons for this purpose.
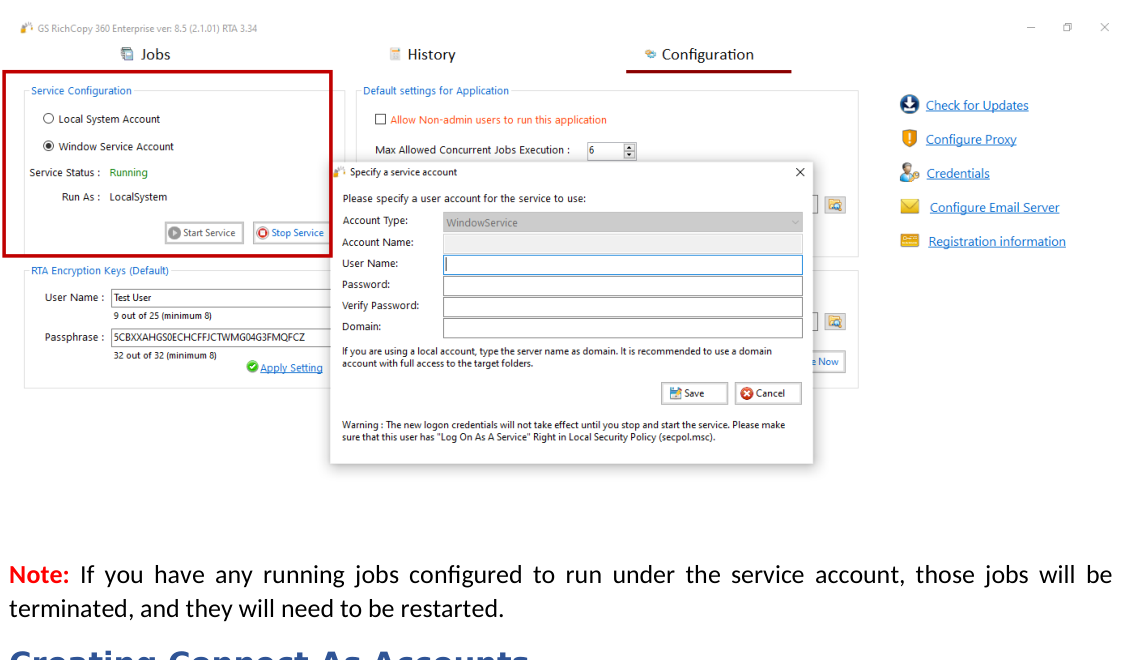
Note: If you have any running jobs configured to run under the service account, those jobs will be terminated, and they will need to be restarted.
Creating Connect As Accounts
GS RichCopy 360 offers the option to run jobs as a logged in user or as a service account. If the service account and logged in user do not have access rights to connect to the source and destination, GS RichCopy 360 provides another option to specify accounts and save them in the GS RichCopy 360 database. These accounts can then be used to Connect As those users who have the necessary permissions for the source and destination when a job is created. For information on creating a job, refer to Managing and Creating Jobs.
Connect As also has the option to configure WebDAV accounts, which can be used to connect TO and FROM WebDAV sites.
Note: Passwords are fully encrypted for each service and Connect As account, and the credentials are saved in GS RichCopy 360.
To create a Connect As account, follow these steps:
-
In the GS RichCopy 360 window, select the Configuration section.
-
Select the Credentials link from the right-side of the screen.
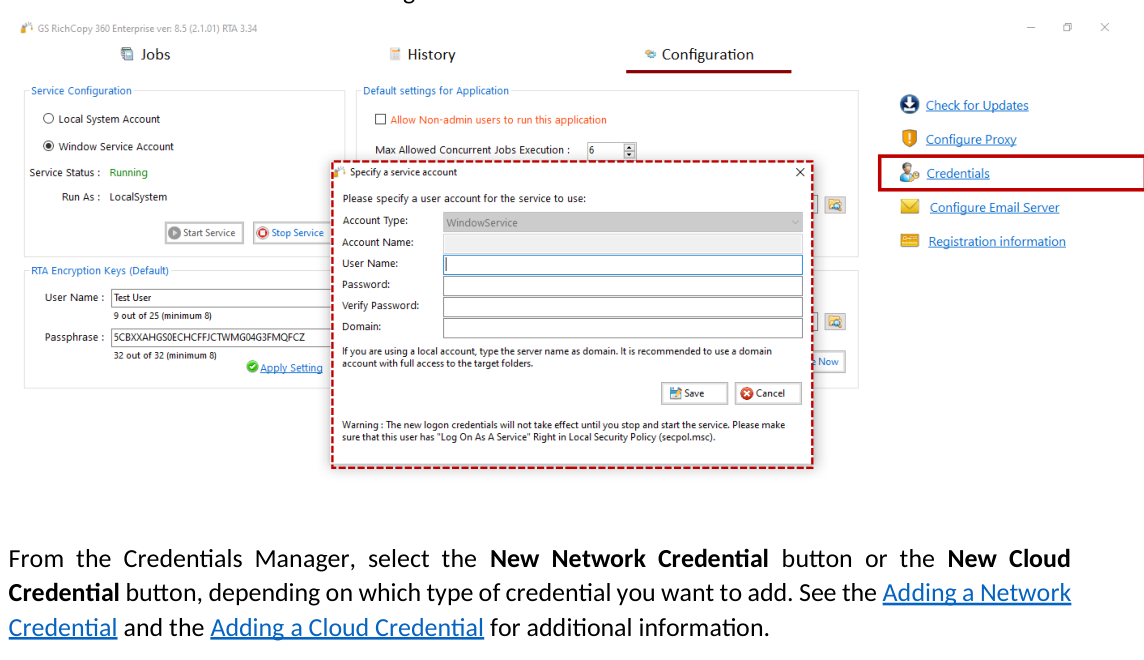
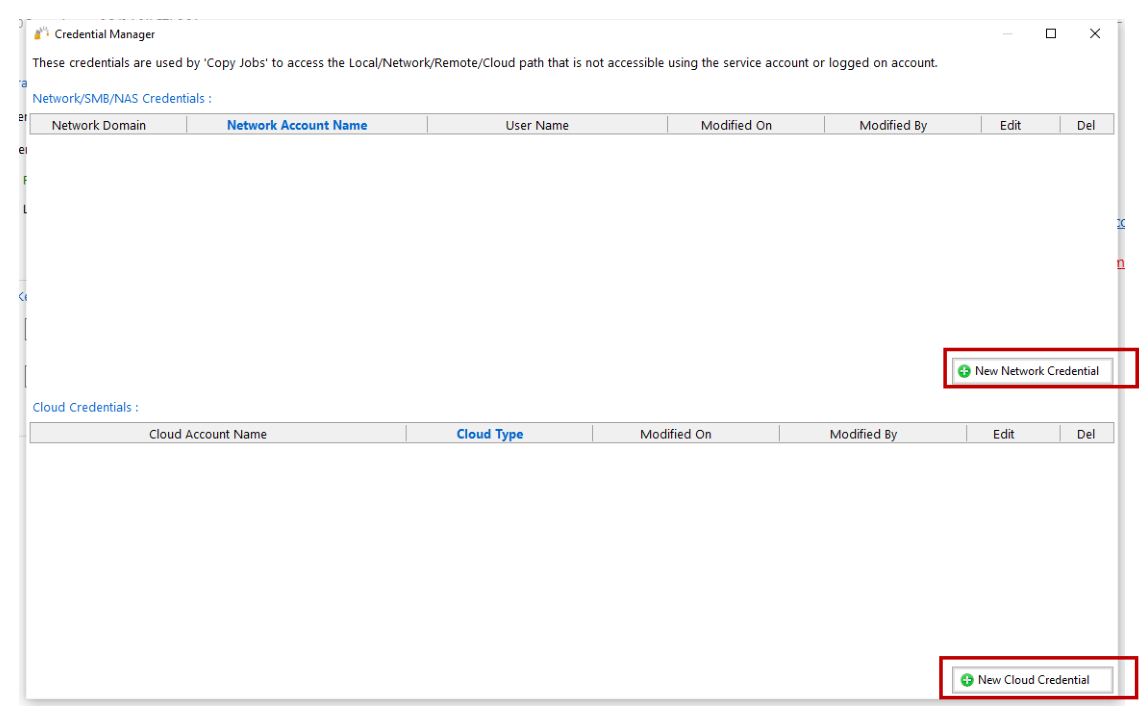
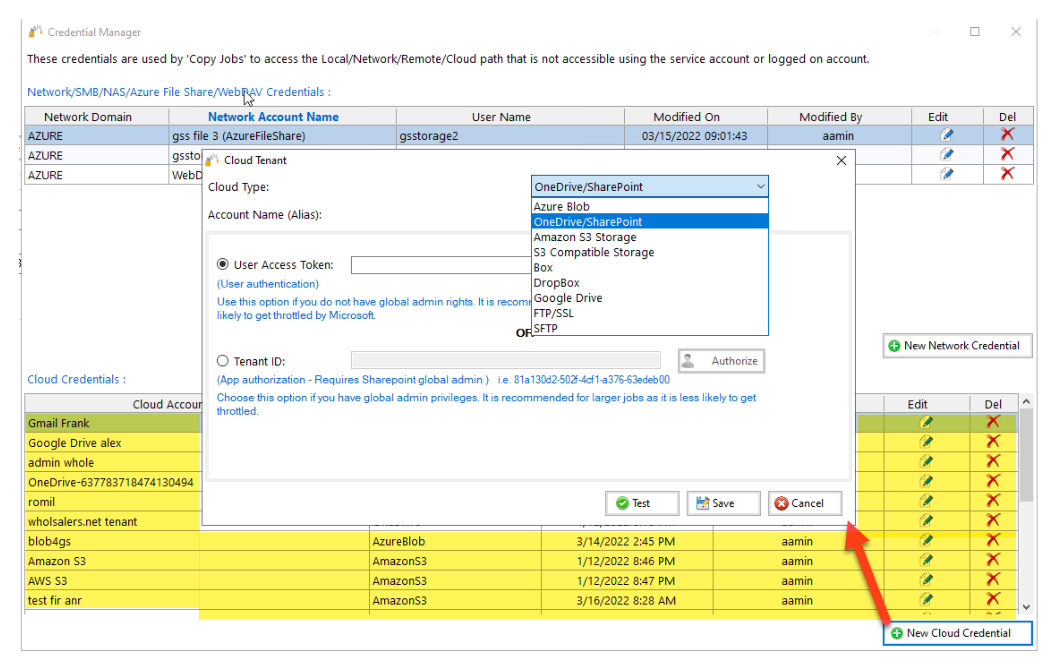
- From the Credentials Manager, select the New Network Credential button or the New Cloud Credential button, depending on which type of credential you want to add. See the Adding a Network Credential and the Adding a Cloud Credential for additional information.
Note: Windows requires the WebDAV Client Feature to be installed to work with Azure Files. Note: Passwords are fully encrypted, and the credentials are saved in the GS RichCopy 360 database.
Adding a Network Credential
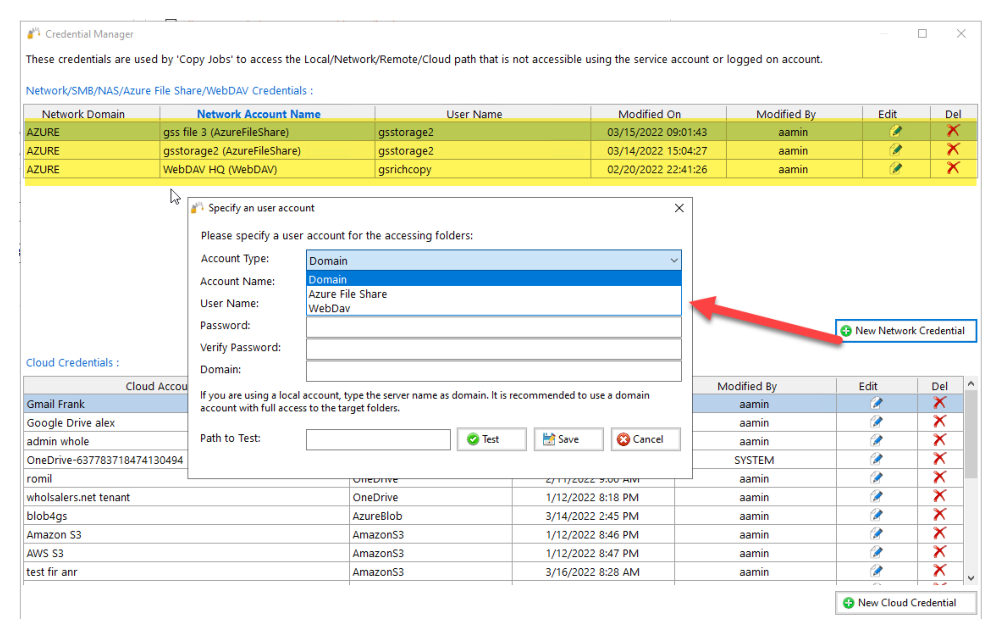
Use the New Network Credential button to add network credentials for the following network connections.
-
Network File Shares – This is normally used for Windows file shares, NAS devices, etc.
-
Azure Files – Connect to Azure Files using a domain user account but only if Azure Files is domain joined to Active Directory or use Access Keys from the storage account as shown in the image below.
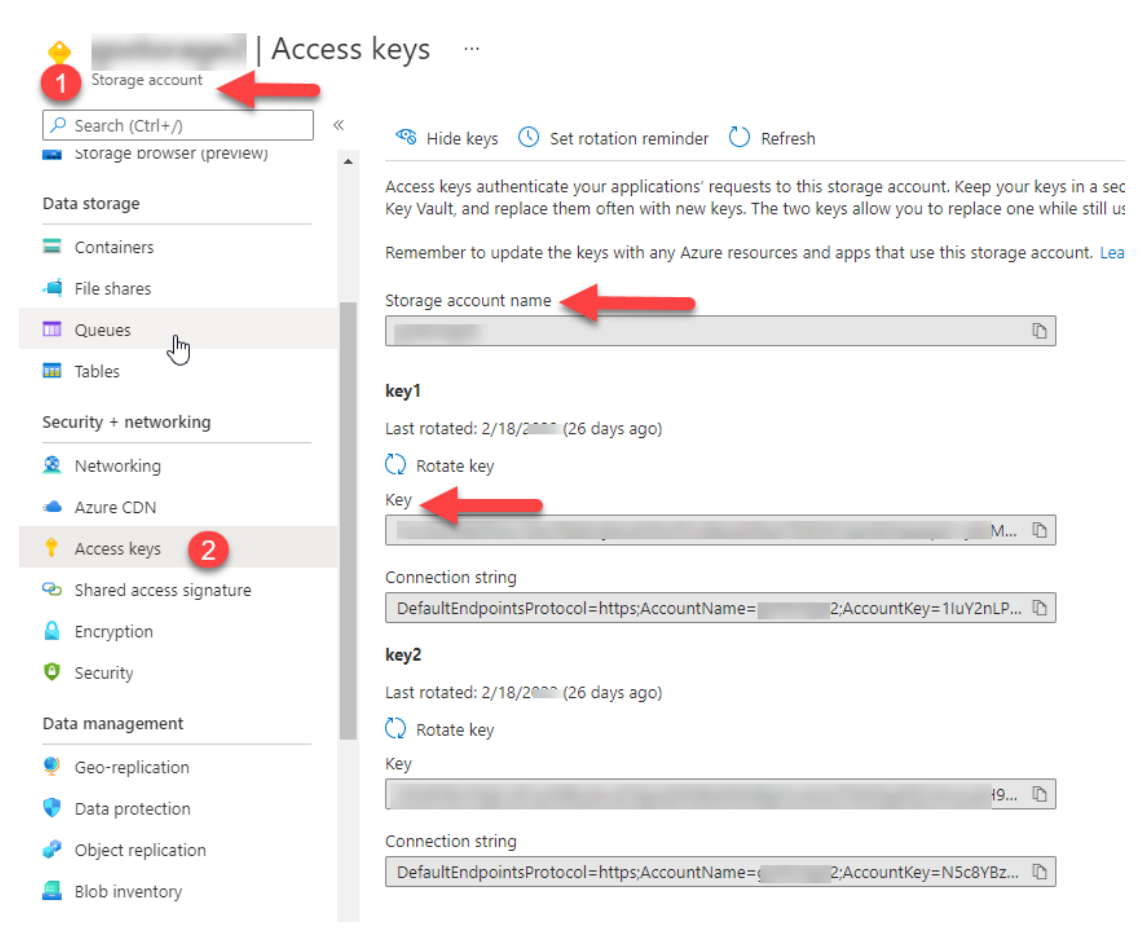
Windows requires the WebDAV Client feature to be installed for the Azure Files functionality to work correctly. See an image of a sample Network Configuration below.
Adding a Cloud Credential
Use this button to add and maintain specific cloud accounts, currently available in GS RichCopy 360. Note that new providers are periodically being added to the list.
Each cloud provider needs its credentials and must also be provisioned on the cloud provider side prior to connecting via our GS RichCopy 360.
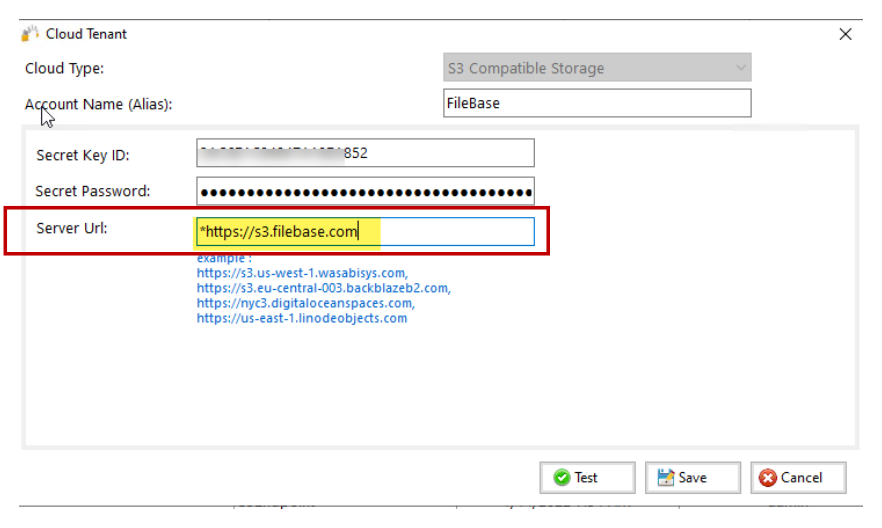
Note: S3 Compatible Storage uses S3 standards to connect to other providers. The following items are required: secret key, password key, and an S3 endpoint.
Note: If an S3 endpoint does not work, append a star next to the S3 Endpoint as in the example below. (This is required for just a few S3 endpoints).
Managing Credentials
To manage existing credentials in GS RichCopy 360, complete the following steps:
-
Go to the Configuration section.
-
Select the Credentials link, located on the right-side of the screen.
-
Select the Pencil icon next to the credential that you want to edit or the large Red X if you want to delete it. Note that Network credentials are located at the top of the Credential table and the Cloud credentials are located at the bottom of the Credential table.
Setting Email Account Configuration
GS RichCopy 360 offers the option to send email notifications once a job completes to alert the user whether the job succeeded or failed. To access the email configuration settings, select Configure Email Server from the Configuration section.
GS RichCopy 360 can use any SMTP server, local, or cloud servers such as Gmail, Hotmail, or Yahoo. Below are two different examples of the configuration.
Note: These settings are inherited on every configured job; the user may also customize recipients for each job.
The following image shows sample settings for an open SMTP Server that requires no authentication.
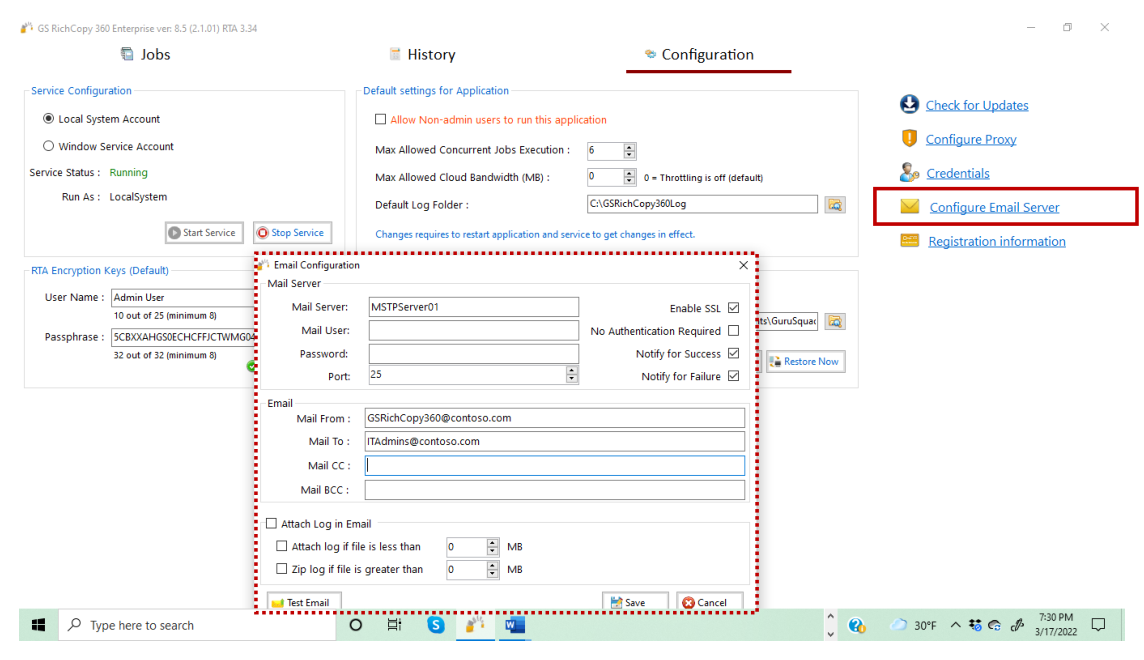
Note: Make sure your non-authenticated SMTP servers can accept relay requests from the machine or machines hosting GS RichCopy 360 if you select this feature. The image below shows sample settings for use with a Gmail.
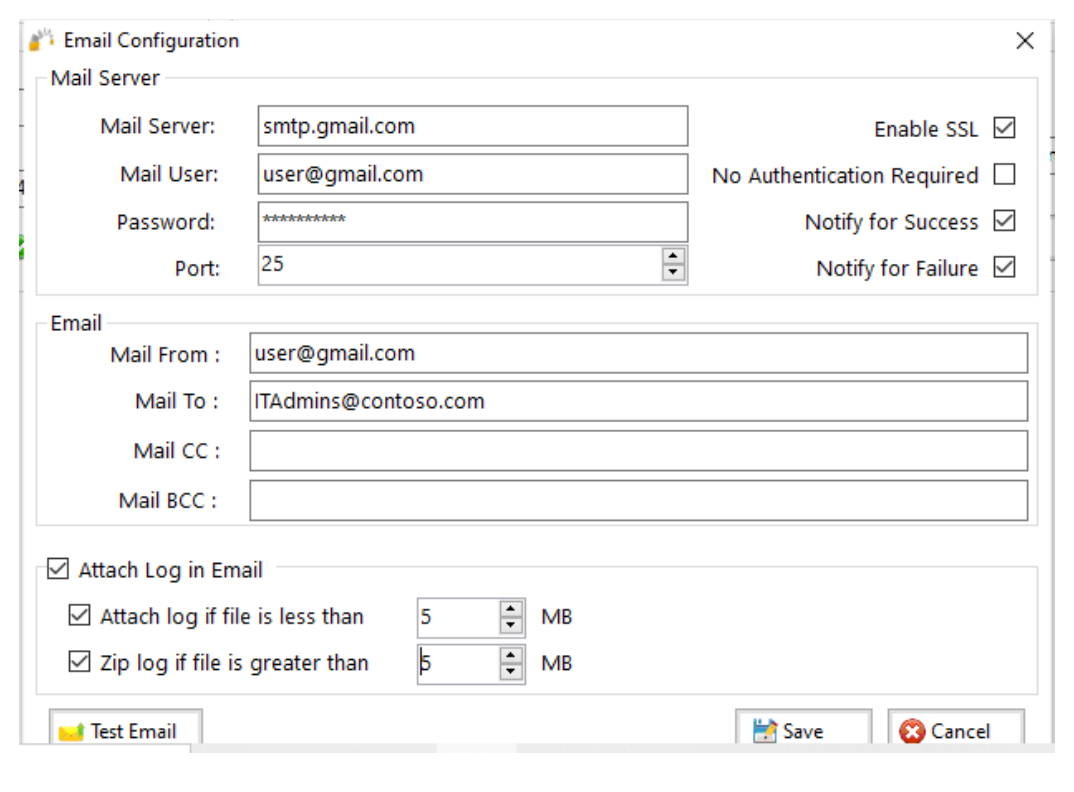
Note: Environment variables are supported in the From, To, CC, and BCC fields. For more information refer to Example Section K: Environment Variables.
Setting the Maximum Allowed Concurrent Jobs Execution
GS RichCopy 360 can run multiple jobs at the same time. However, running many jobs simultaneously can impact performance and may be difficult to manage. We recommend setting a maximum concurrent job limit.
To set the maximum number of jobs that can run simultaneously, select a number in the Max Allowed Concurrent Jobs Execution field. The default value is 6.
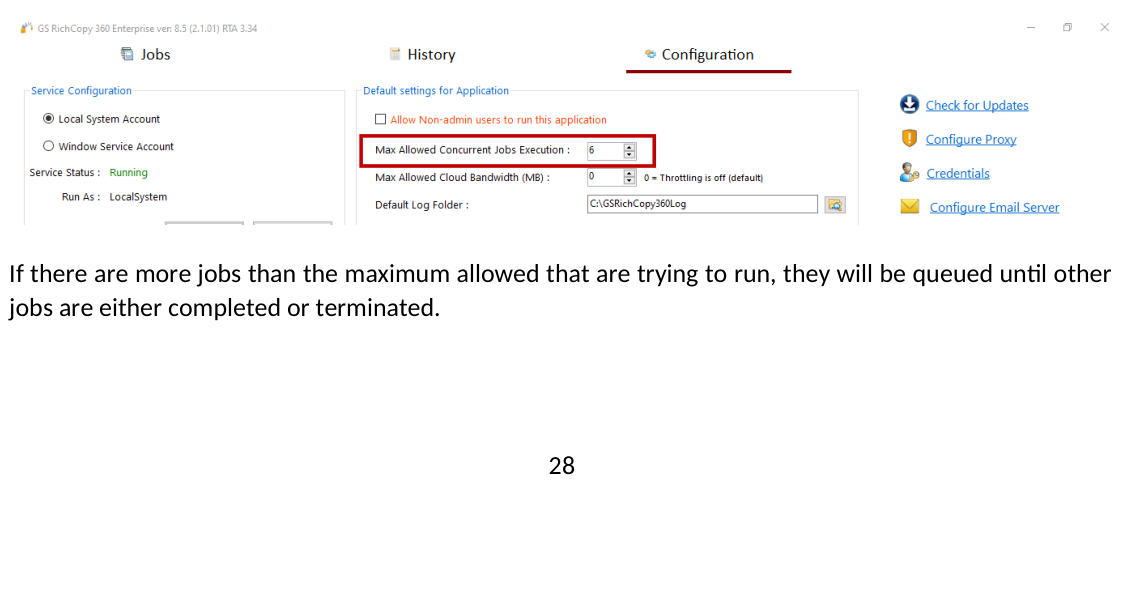
If there are more jobs than the maximum allowed that are trying to run, they will be queued until other jobs are either completed or terminated.
Example: If the maximum allowed concurrent job execution is set to 6, and 8 jobs are trying to run simultaneously, GS RichCopy 360 will allow only 6 jobs to run and the remaining 2 will be queued until 2 of the 6 jobs complete or stop.
Backing up and Restoring the GS RichCopy 360 Database
GS RichCopy 360 saves entire configuration settings, including job definitions, to a single database stored locally on the machine. The database file is called GSRichCopy360.sdf and its default location is the C:\GSRICHCOPY360DB folder.

Creating a backup
GS RichCopy 360 offers the option to have the database backed up regularly at a specific schedule. By default, this option is not enabled. The database can also be backed-up on-demand by selecting the Backup Now button. To set a backup schedule, follow these steps:
-
At the Database Backup Scheduling section, select the Automatic Database Backup check box.
-
Select the number of days and the specific time.
Note: If you do not make changes often to the database, it is recommended you space out the number of days to minimize the number of backup files.
- Select a database Backup Folder.
Note: It is highly recommended that the backup location be stored in a different location from where the GS RichCopy 360 currently resides.
Restoring the database
Restoring the database will overwrite everything stored in the current database. To restore the database, select the Restore Now button.
WARNING: Restoring the database will overwrite everything (e.g. job definitions, configurations) stored in the current database. The GS RichCopy 360 service must be stopped prior to restoring the database. Once the database is restored, the GS RichCopy 360 user interface and service must be restarted to reload and reflect the new configurations.
Allowing non-admin users to use GS RichCopy 360
By default, only users with local administrator privileges or those who belong to the local administrator group can run GS RichCopy 360. However, GS RichCopy 360 provides the Allow Non-admin users to run this application option to allow non-admin users to use the application.
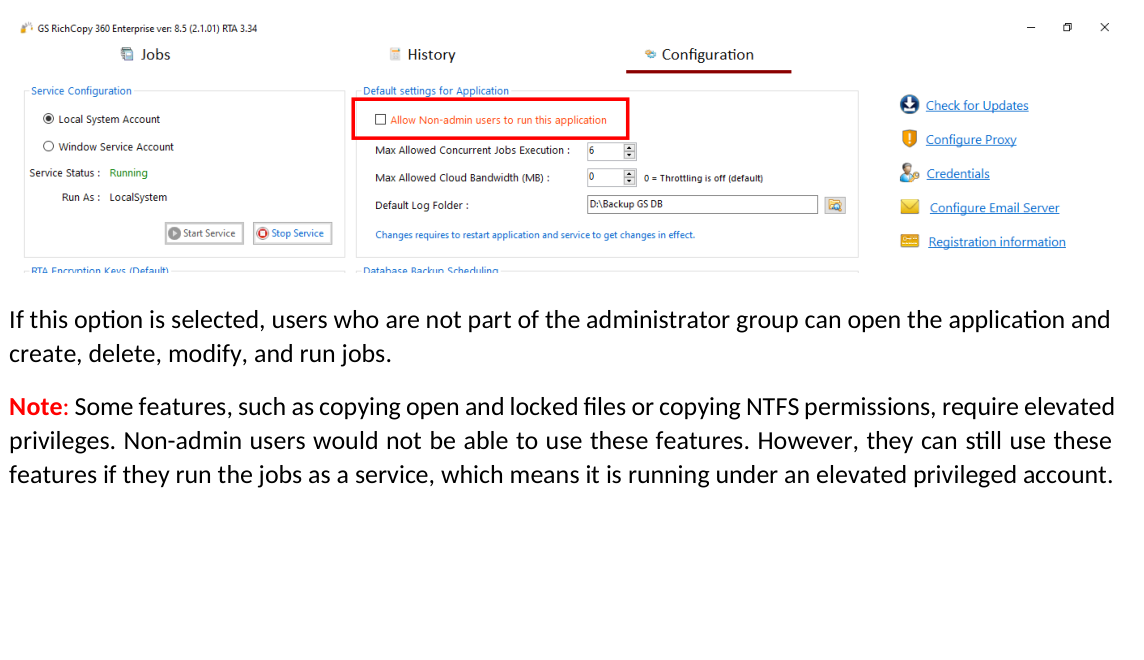
If this option is selected, users who are not part of the administrator group can open the application and create, delete, modify, and run jobs.
Note: Some features, such as copying open and locked files or copying NTFS permissions, require elevated privileges. Non-admin users would not be able to use these features. However, they can still use these features if they run the jobs as a service, which means it is running under an elevated privileged account.