Copy Files to Azure Files
Azure Files has gained much popularity as a replacement for windows file shares. Many organizations looking for alternate scalable and highly available solutions to replace their own on-prem solutions chose Azure Files.
GS RichCopy 360 Enterprise simplifies the migration to Azure Files due to its out-of-the-box integration. The video above covers how to set up a migration job using GS RichCopy 360 Enterprise to Azure Files.
How To Transfer Your Files From Local Drive To Azure File Share
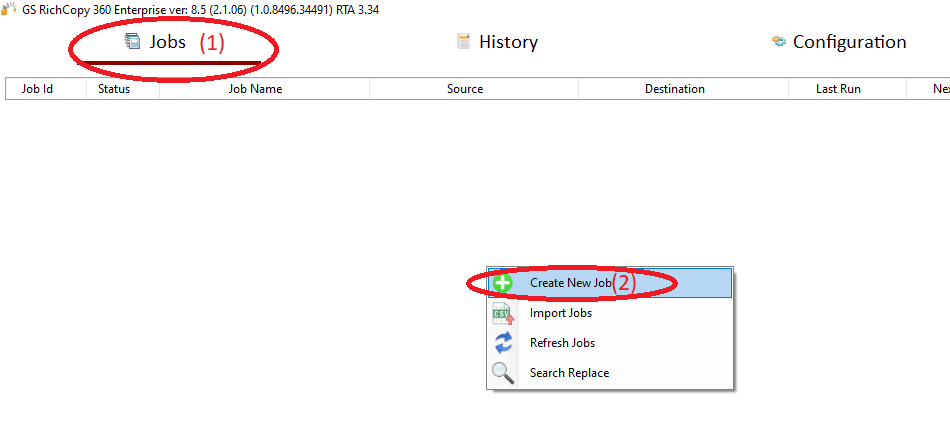
1) Open the program , select Jobs (1) then choose “Create New Job” (2)
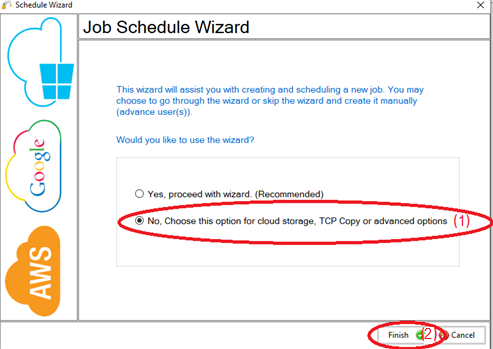
2) Choose “No, Choose this option for cloud storage, TCP Copy or advanced options” (1) , then click “Finish” (2)
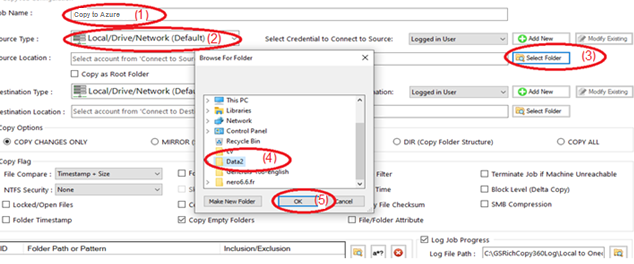
3) Name the job (1) , Source type “Local/Drive/Network”(2) , click “Select Folder”(3) , Browse and choose your folders/files (4) , then choose “OK” (5)
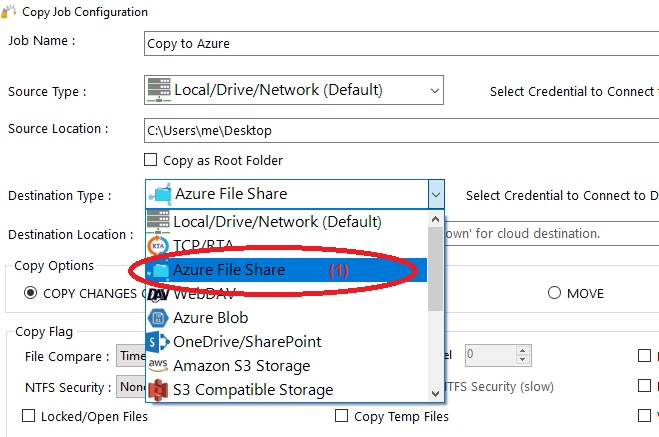
4) From Destination type , choose “Azure File Share” (1)
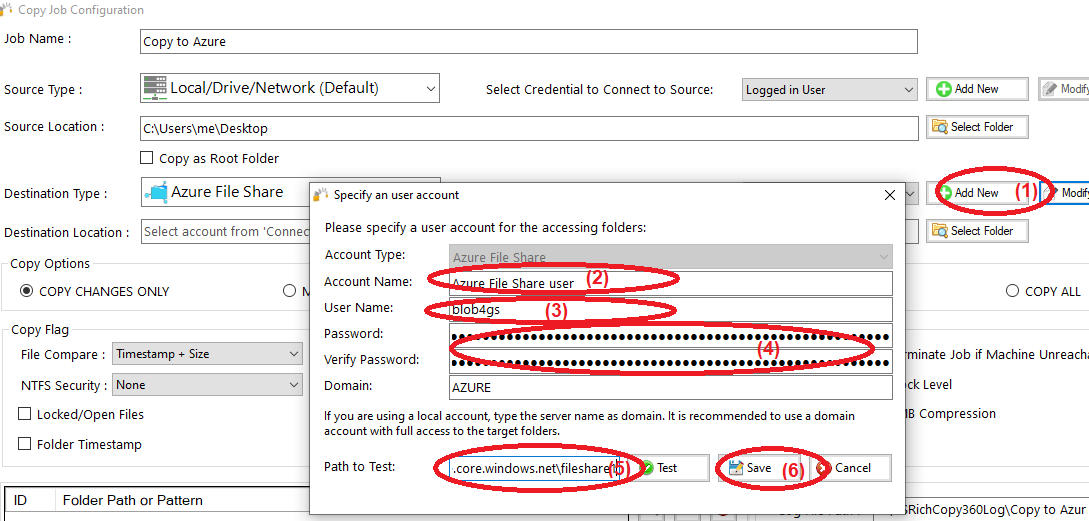
5) Choose “Add new”(1) to add the Azureaccount , write any name for this account (2) , enter the user name (3) , enter password and verify it (4) , optionally you can enter the path to test (5) , then click “Save” (6)
6) Enter the destination location (1) , Click “Select Folder” (2) , choose the destination folder (3) , click “OK” (4) , then click “Save” (5)

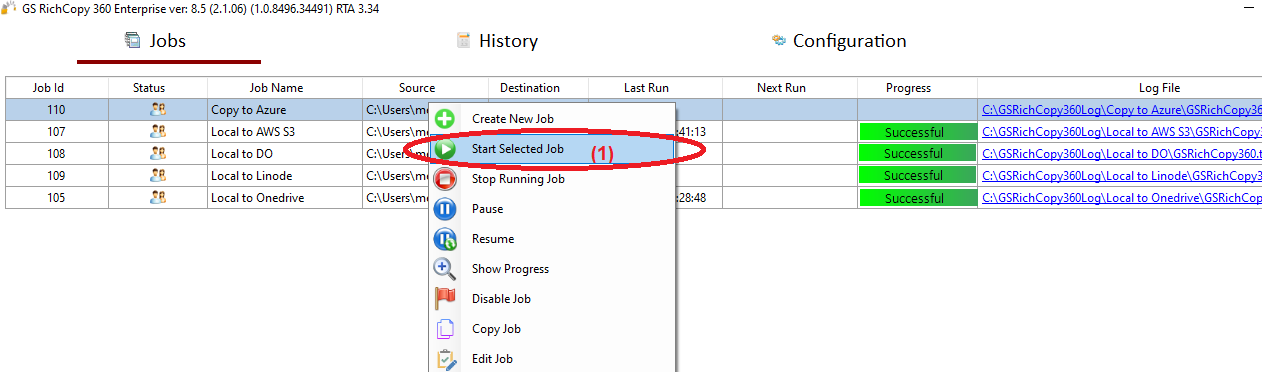
7) Your job will be created as below, Right Click on the job and then choose “Start Selected Job” (1) to run the job