Migrate Files to Box.com
Copying files to or from Box.com is painless when using GS RichCopy 360 Enterprise. Simply, set the destination to Box.com and click to add credentials. Then authorize the application and you should be able to see all of your Box.com folders.
The same can be done to copy files from Box.com. Set the source as Box.com and add the credentials. Whether the task is to migrate to or from Box.com or backup Box.com, GS RichCopy 360 Enterprise can handle the job using its native Box.com API integration.
How To Transfer Your Files From Local Drive To Box.com
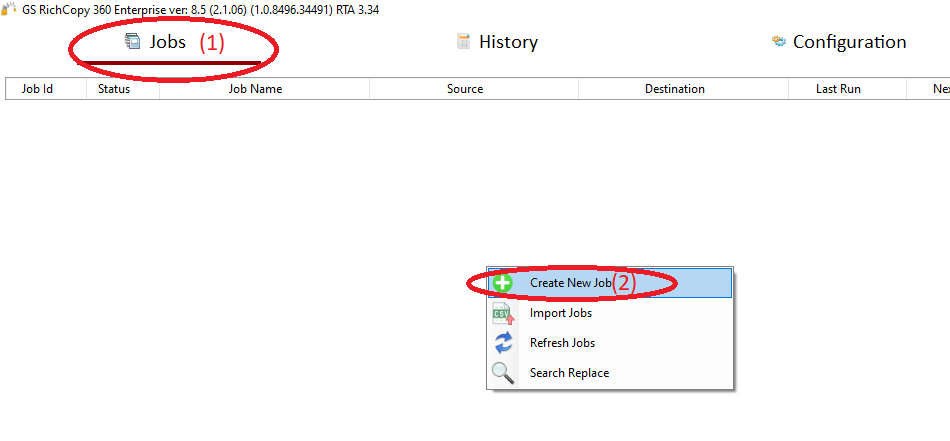
1) Open the program, select Jobs (1) then choose “Create New Job” (2)
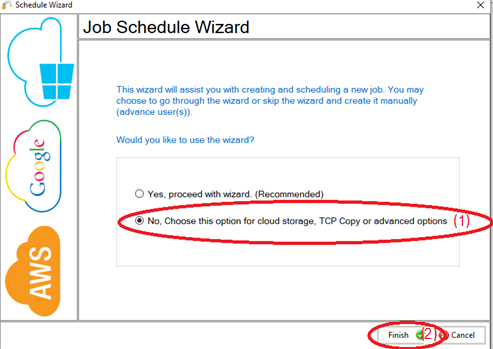
2) Choose “No, Choose this option for cloud storage, TCP Copy or advanced options” (1) , then click “Finish” (2)
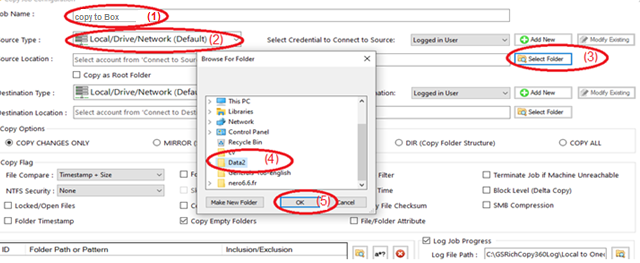
3) Name the job (1) , Source type “Local/Drive/Network” (2) , click “Select Folder” (3) , Browse and choose your folders/files (4) , then choose “OK” (5)
4) From Destination type , choose “Box.com” (1)

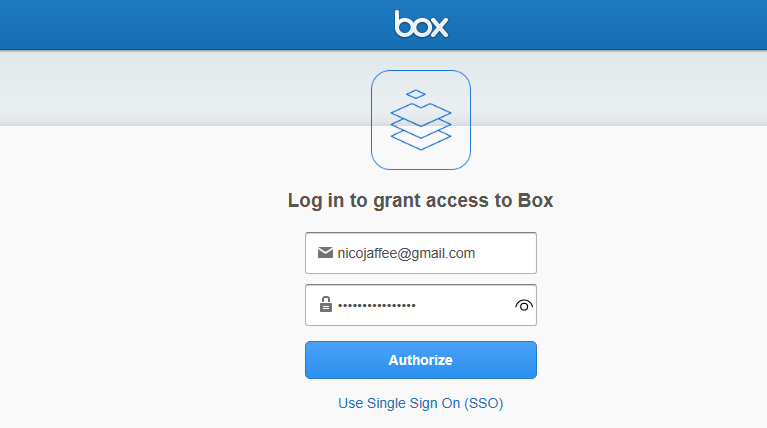
5) Choose “Add new” (1) to add Box.comaccount , write any name for this account (2) , then Click “Authenticate” (3)

6) You will be directed to your browser to login to box.com account
7) Click on “Grant access to Box” (1)
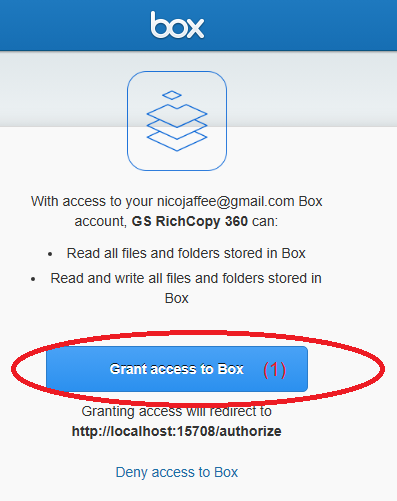
8) This message means you are success to login to your Box.com account

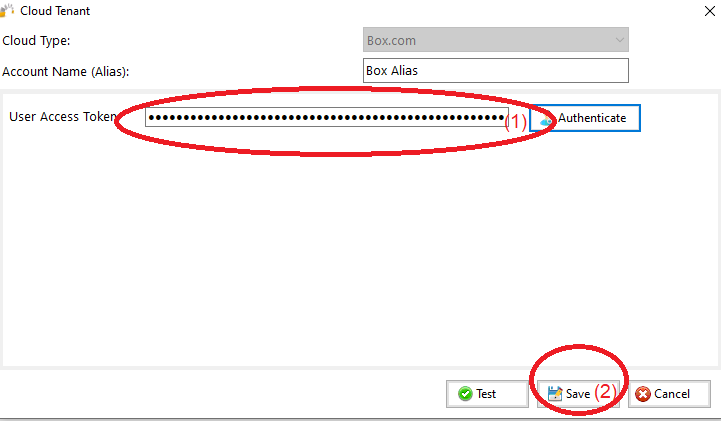
9) User Access Token will be auto fill (1) , just click “Save” (2)
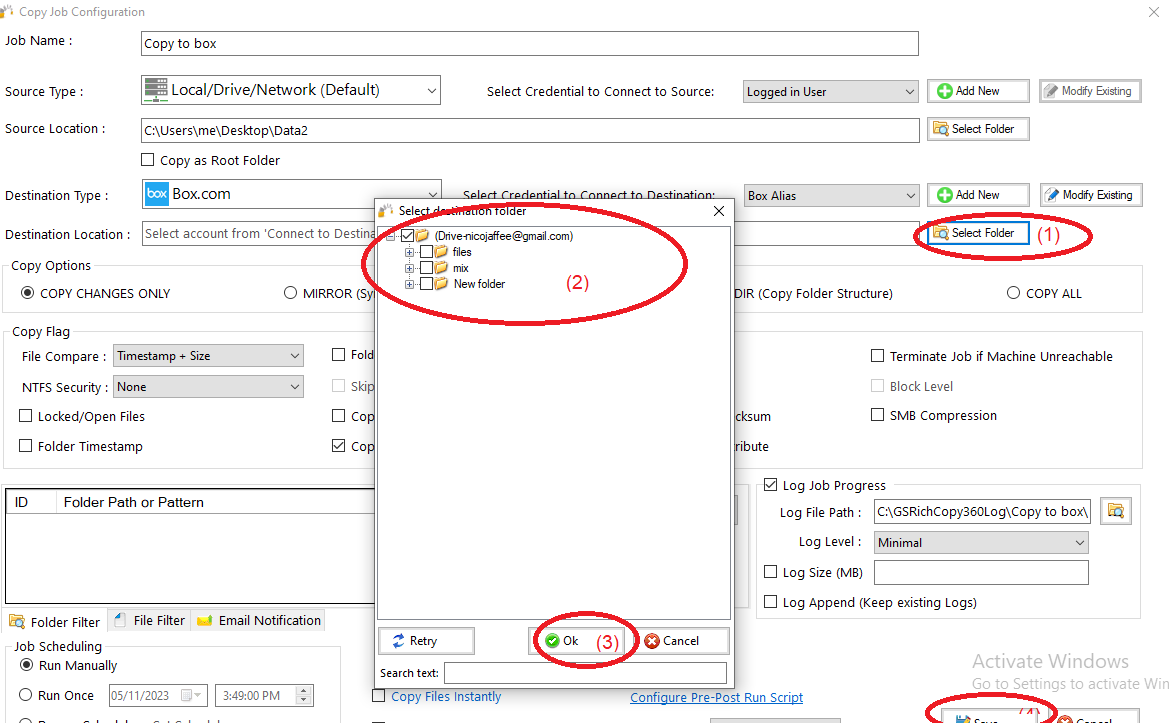
10) Click “Select Folder” (1) , choose the destination folder (2) , click “OK” (3) , then click “Save” (4)
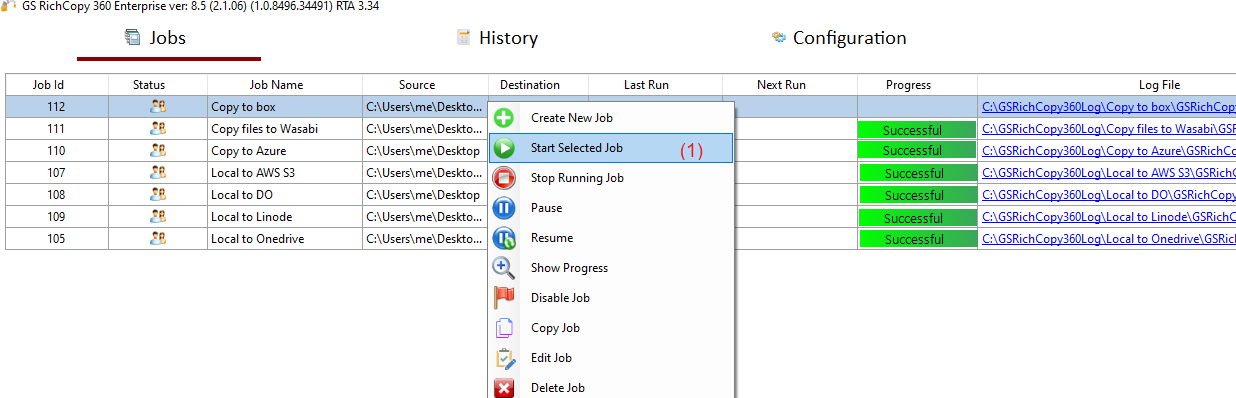
11) Your job will be created as below, Right Click on the job and then choose “Start Selected Job” (1) to run the job